Incorporating the optional Disqus library into Galaxie Blog
|
Apr 28 |

In order to incorporate the optional Disqus library, Galaxie Blog requires three keys- the Disqus Blog Identifier (or Short Name), and optionally, the Disqus API Key and API Secret. Setting up a Disqus account and obtaining these keys are free. I will walk you through the steps to register with Disqus and enter the Disqus keys into Galaxie Blog.
To incorporate the Disqus comment system into your own blog, you first need to create a Disqus account to obtain your Disqus Blog Identifier, otherwise known as your blog's short name. You should also create a free developer account in order to acquire a Disqus API key. I will briefly walk you through the required steps to obtain both keys. If you already have a Disqus blog identifier and API key, you can skip the first two sections and read Entering your Disqus Keys.
Register your site and obtain your Disqus Blog Identifier
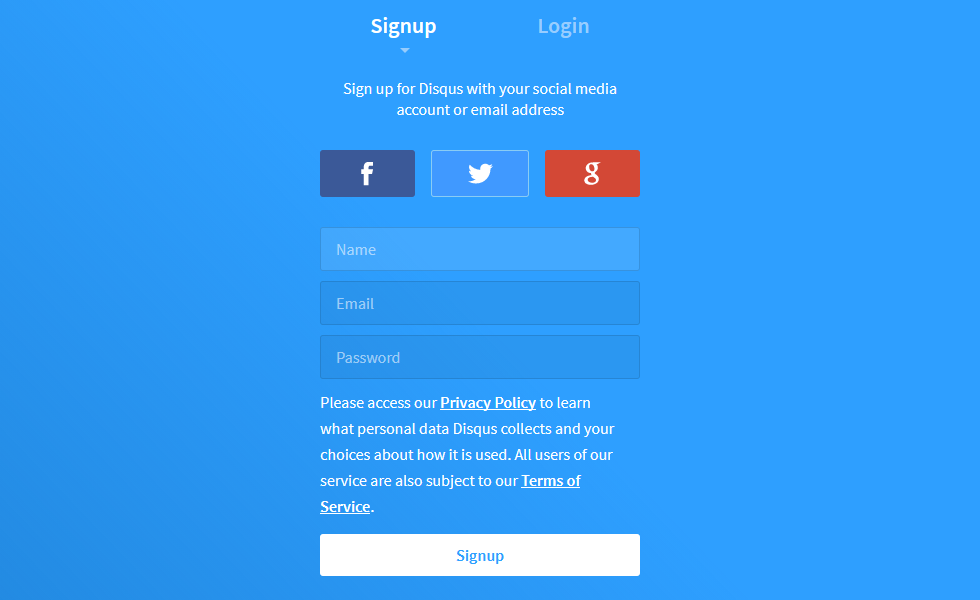
- First, sign up for a free Disqus account at www.disqus.com
- Click on the get started button
- Enter your name and email, and create a password. You will need to verify your email with Disqus before you continue.
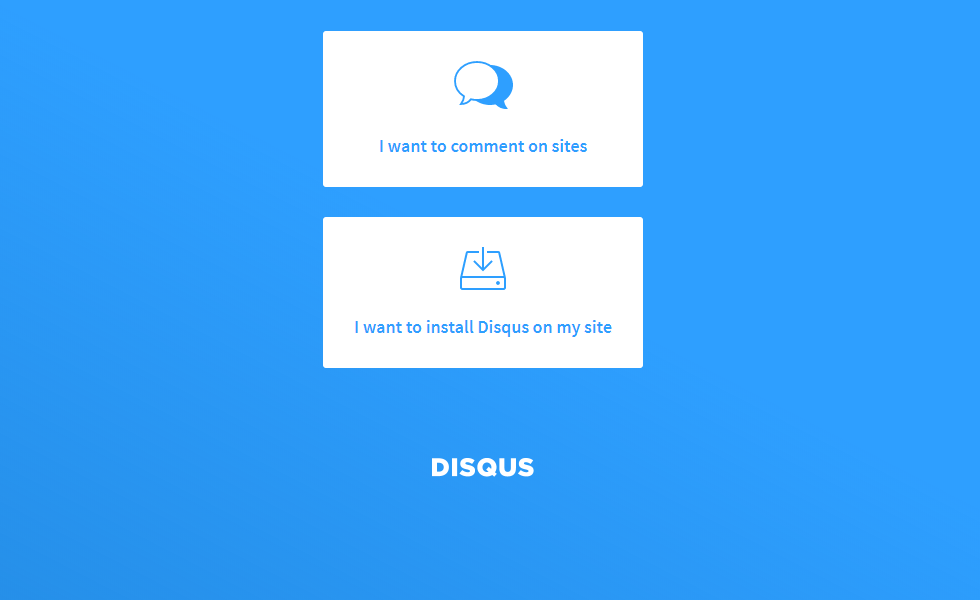
- Once you're done creating your profile, click on I want to install Disqus on my site.

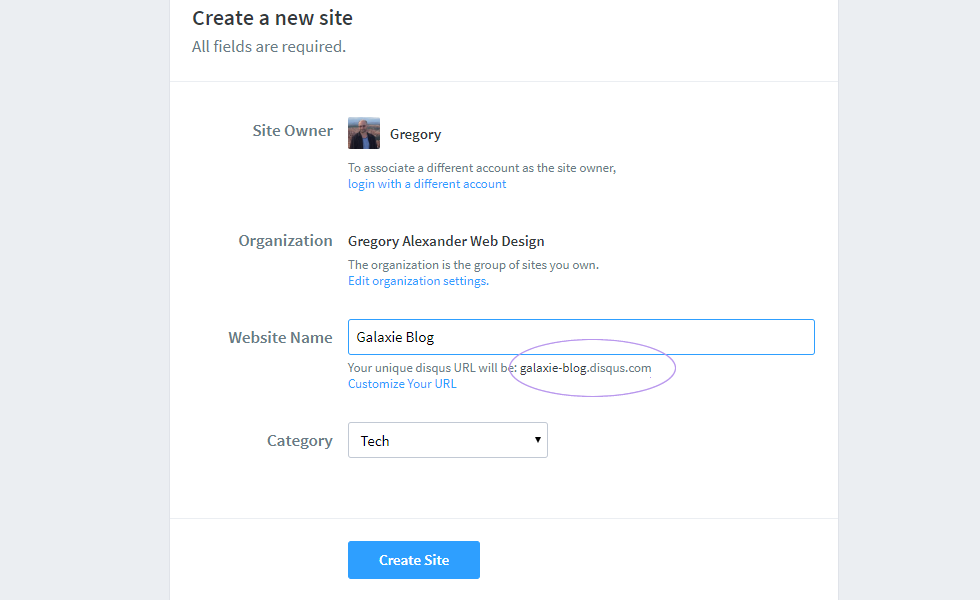
- Register your site by including the name of your site, and choose an appropriate category.
- Prior to clicking on the Create Site button, you'll notice the short name of your site. I highlighted the short name with a circle. If you didn't notice this before registering, don't worry- you will be able to look it up later.
- Click on Create site.
- For a personal blog, I recommend selecting the Basic plan. The basic plan does have a Disqus label at the bottom of the comments interface, but it is free. You're welcome to choose a paid plan if you want, but it is not necessary.
- You don't need to do anything on the Select Platform interface. I have integrated Disqus into Galaxie Blog. We need to move on to the configuration settings.
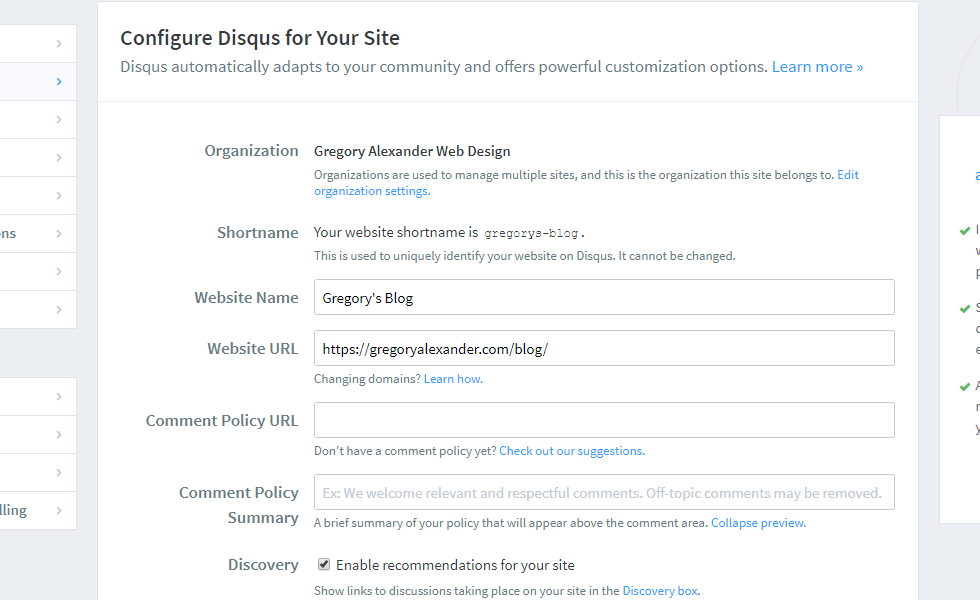
- In the configuration settings, enter the website name, URL, category, and description. You don't need to enter pages for your own policies right now, you can come back to this later.
- Click on the Complete setup button

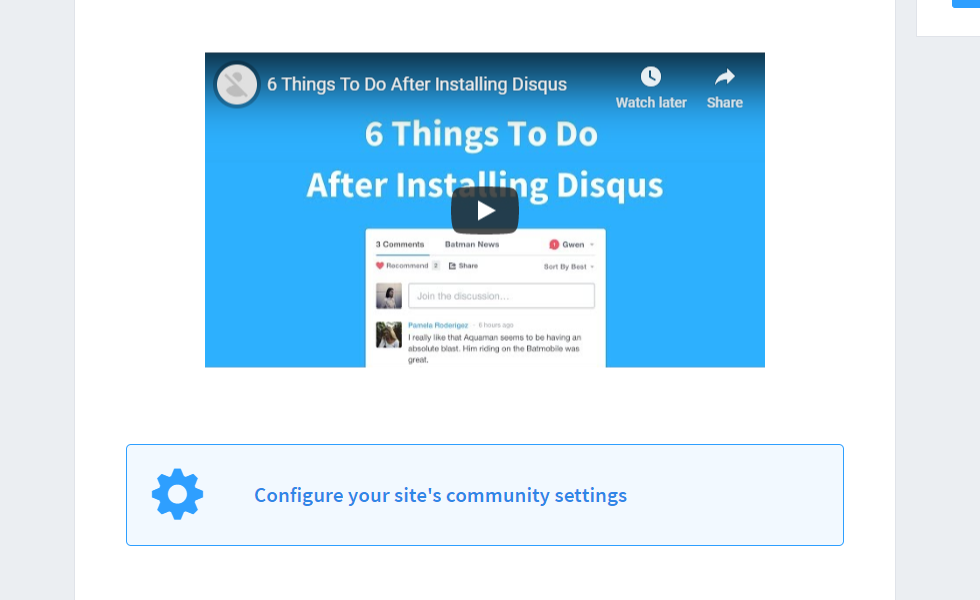
- On the next Setup Complete page, scroll to the bottom of the page and click on the Configure your site's community settings link.
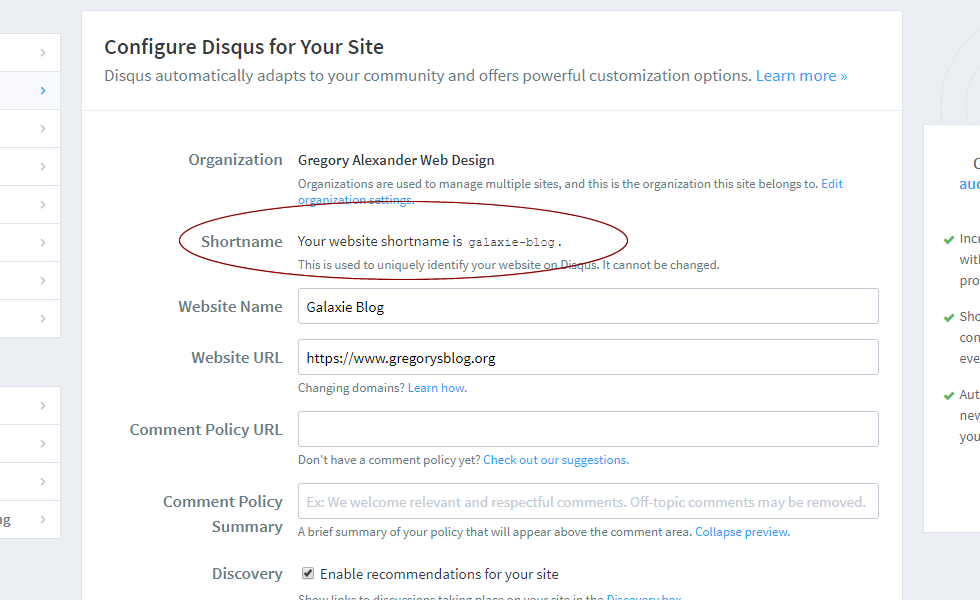
- Take note of your blog's Short Name in the 2nd setting. Copy this string. You will need it later to paste into Galaxie Blogs disqusBlogIdentifier setting.
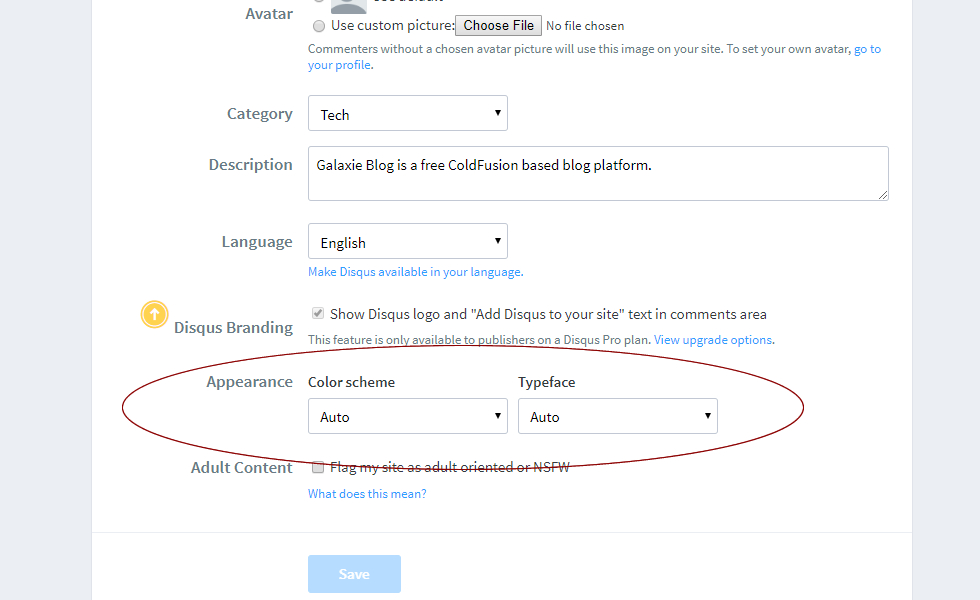
- Make sure that the color scheme is set to automatic. This is needed to have Disqus adjust the comment interface with Galaxie Blog's multiple themes.
- Click on the Save button
Getting your Disqus API Keys
After you register your Disqus account, you should also consider signing up for a free Disqus API Key. A Disqus API Key allows you to build your own widgets, such as a recent comments interface. For Galaxie Blog owners, the optional API Key allows Galaxie Blog to display my own custom recent comments interface that blends in with the Galaxie Blog themes. It also allows Galaxie Blog to have an accurate comment count in the administrative interface. The API key is free, and the free version generously allows for 10,000 calls per hour at the time of writing. The limit is sufficient on immensely popular blogs, such as Raymond Camdens blog. The free API key should suffice.
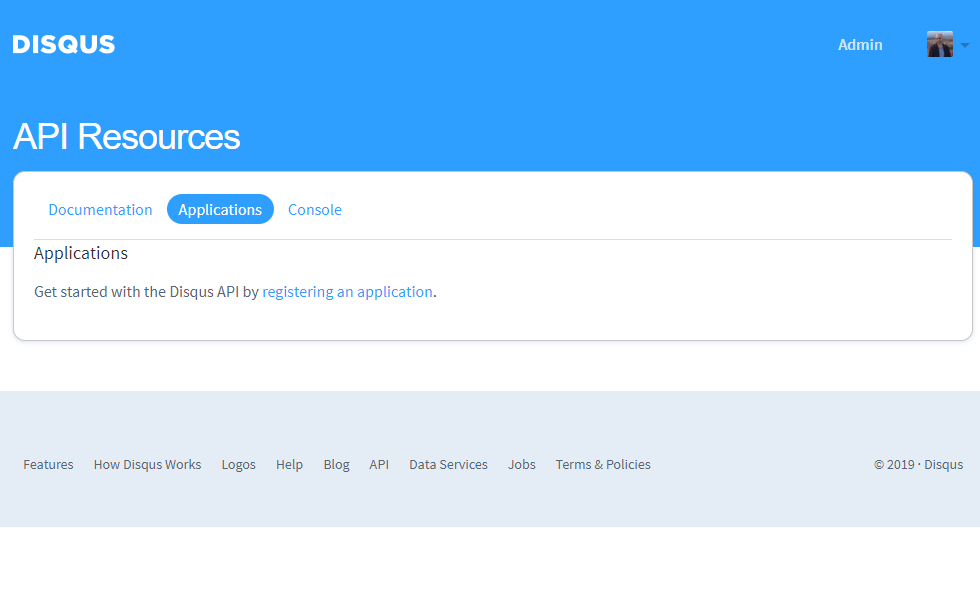
- Don't look for the API key after registering your site with Disqus. It is not available using the default Disqus interface. You will have to go to the Disqus API page.
- Navigate to https://disqus.com/api/applications/ and click on Applications
- Enter your site information and register your application
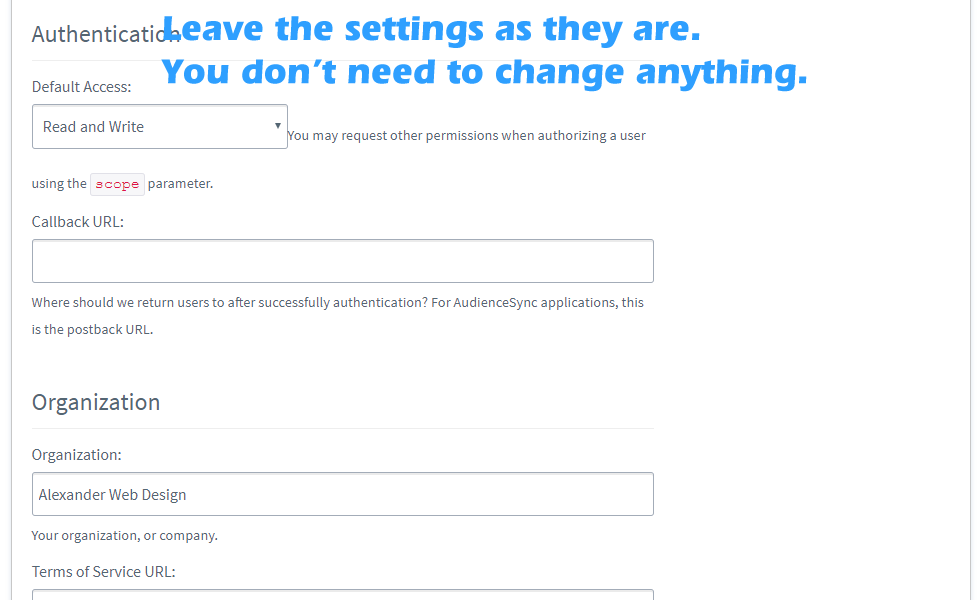
- On the next page, leave the default settings as they are. You don't need to add or change anything, just click Save changes

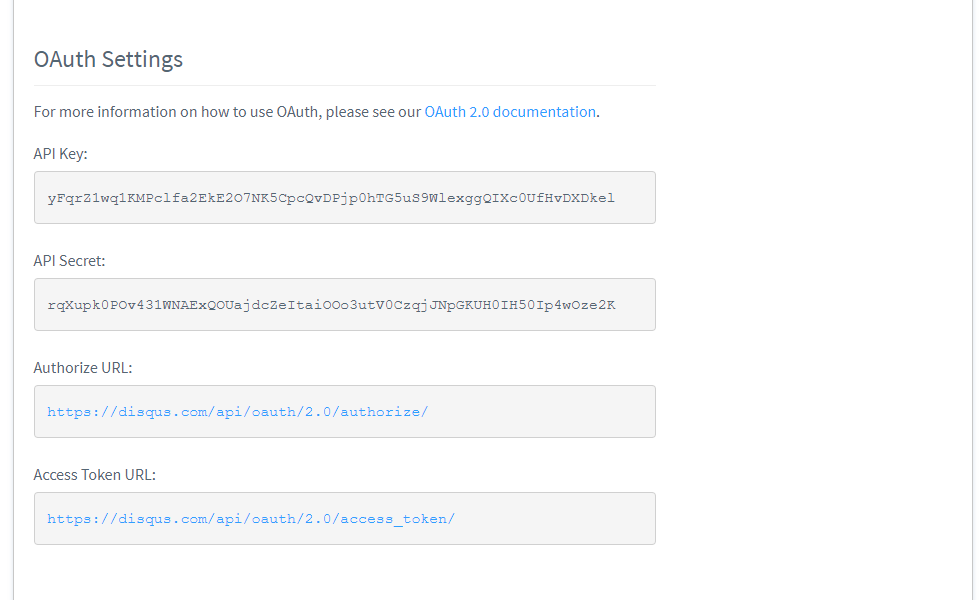
- The next screen is a little confusing. At the time of the writing, it seems as if you have just refreshed the page. Here, just click on the Details link at the top of the page. I am attaching a screenshot.
- Your new Disqus API Key is found underneath the OAuth settings on the Details screen.
- If you are here just to obtain your Disqus Blog Identifier (aka short name) and API key for Galaxie Blog, continue to the next page. If you're a developer looking into incorporating Disqus into your own site, you may want to take a look at the Common Libraries page.

Entering the Disqus Keys into the Galaxie Blog Administration Site
- Once you have your own Disqus Blog Identifier, you can immediately incorporate Disqus using Galaxie Blog by entering the three keys into the Galaxie Blog Administration site
- Log in to the Galaxie Blog Administration site
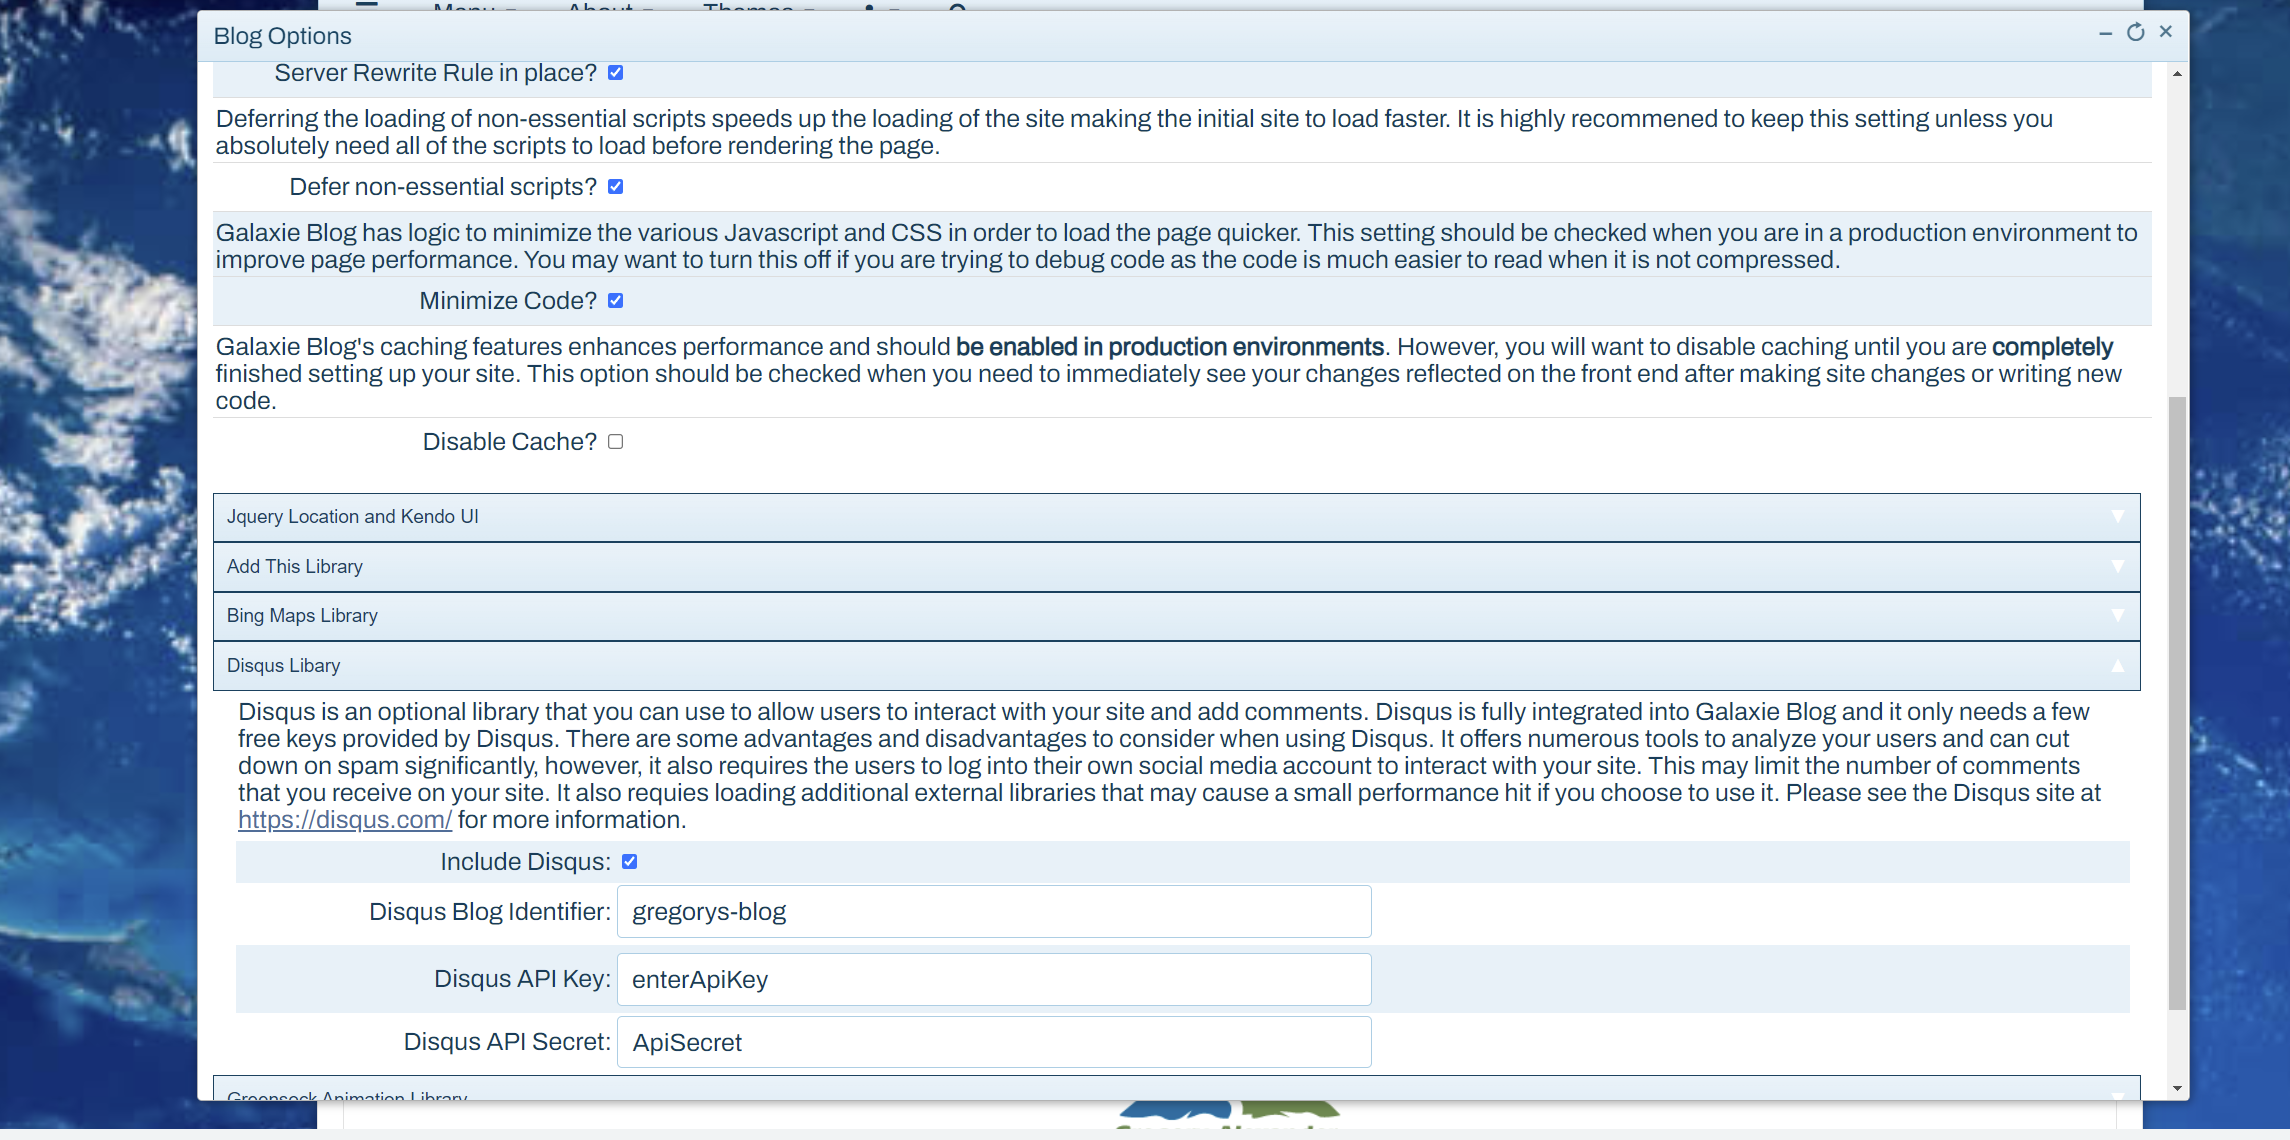
- Open the Blog Options Interface
- Click on the Disqus Library Ribbon
- Finally, enter the Disqus Blog Identifier (also known as the Disqus Short Name), the Disqus API Key and the Disqus API Secret into the form fields.

That's it! Refresh the page and your Disqus commenting system should be in place.
Happy Blogging!
Note: this article has been rewritten for Galaxie Blog 3
Related Entries
Tags
Disqus Integration, Disqus IntegrationThis entry was posted on April 28, 2022 at 9:08 PM and has received 1528 views.