Creating Beautiful Galleries Within a Blog Post Using Galaxie Blog
|
May 1 |
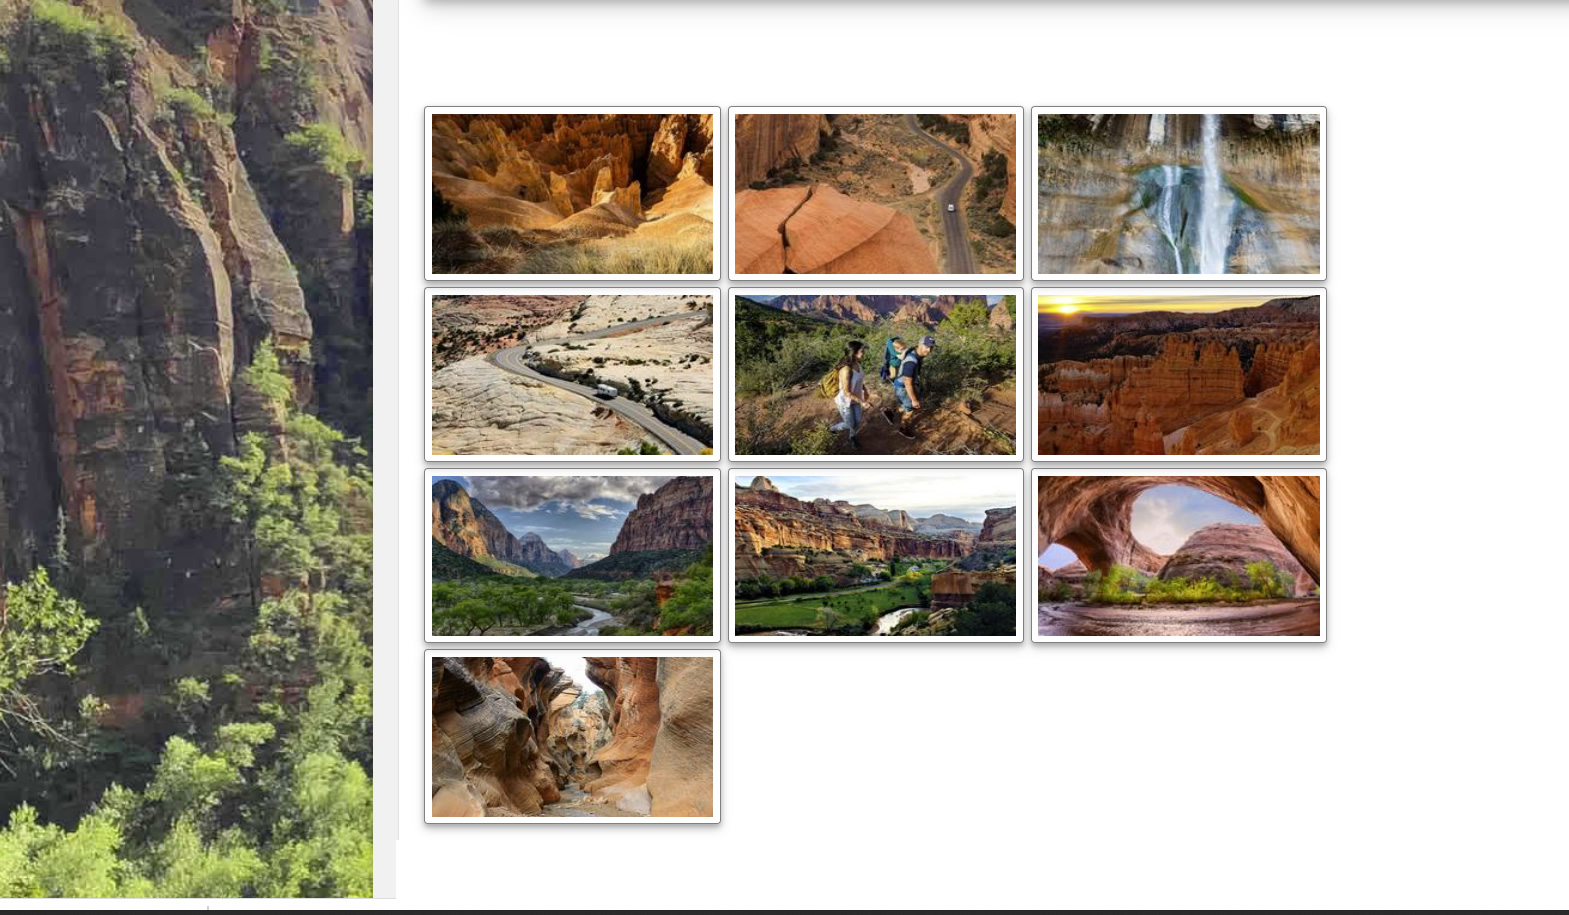
Image Galleries
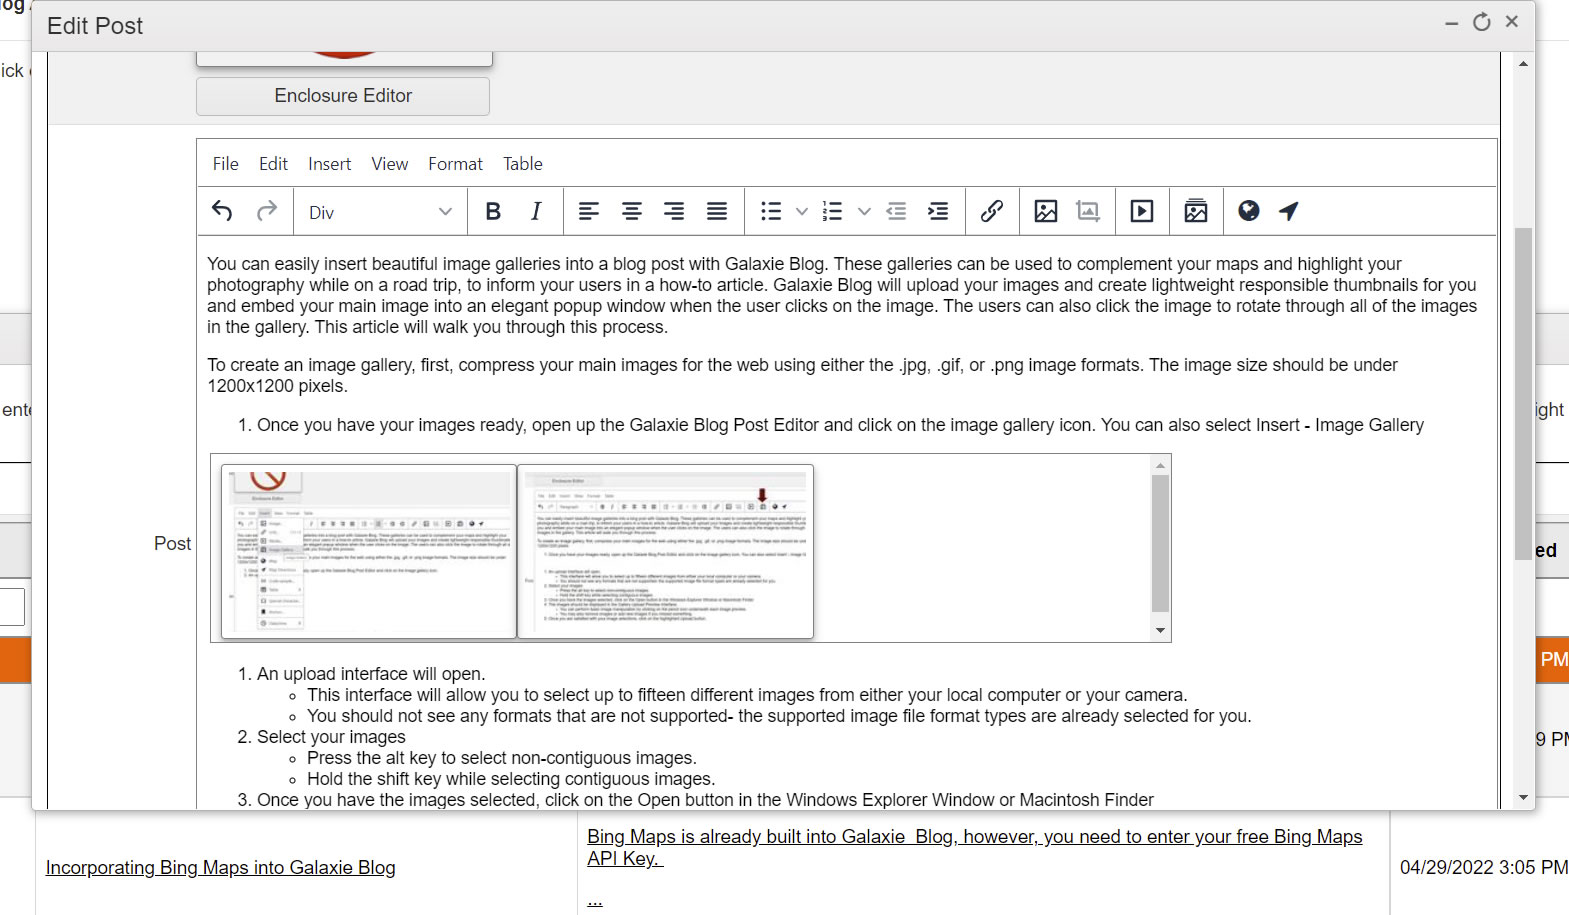
With Galaxie Blog, you can easily insert beautiful image galleries into a blog post. These galleries have a multitude of different uses. For example, they can complement your maps and highlight your photography while on a road trip or inform your users in a how-to article.
Galaxie Blog will upload your images, create lightweight, responsive thumbnails, and pop up the main image into an elegant window when the user clicks on it. The users can also click the images to rotate through all of the images in the gallery. This article will walk you through this process.
These galleries are responsive and will look great on any device.
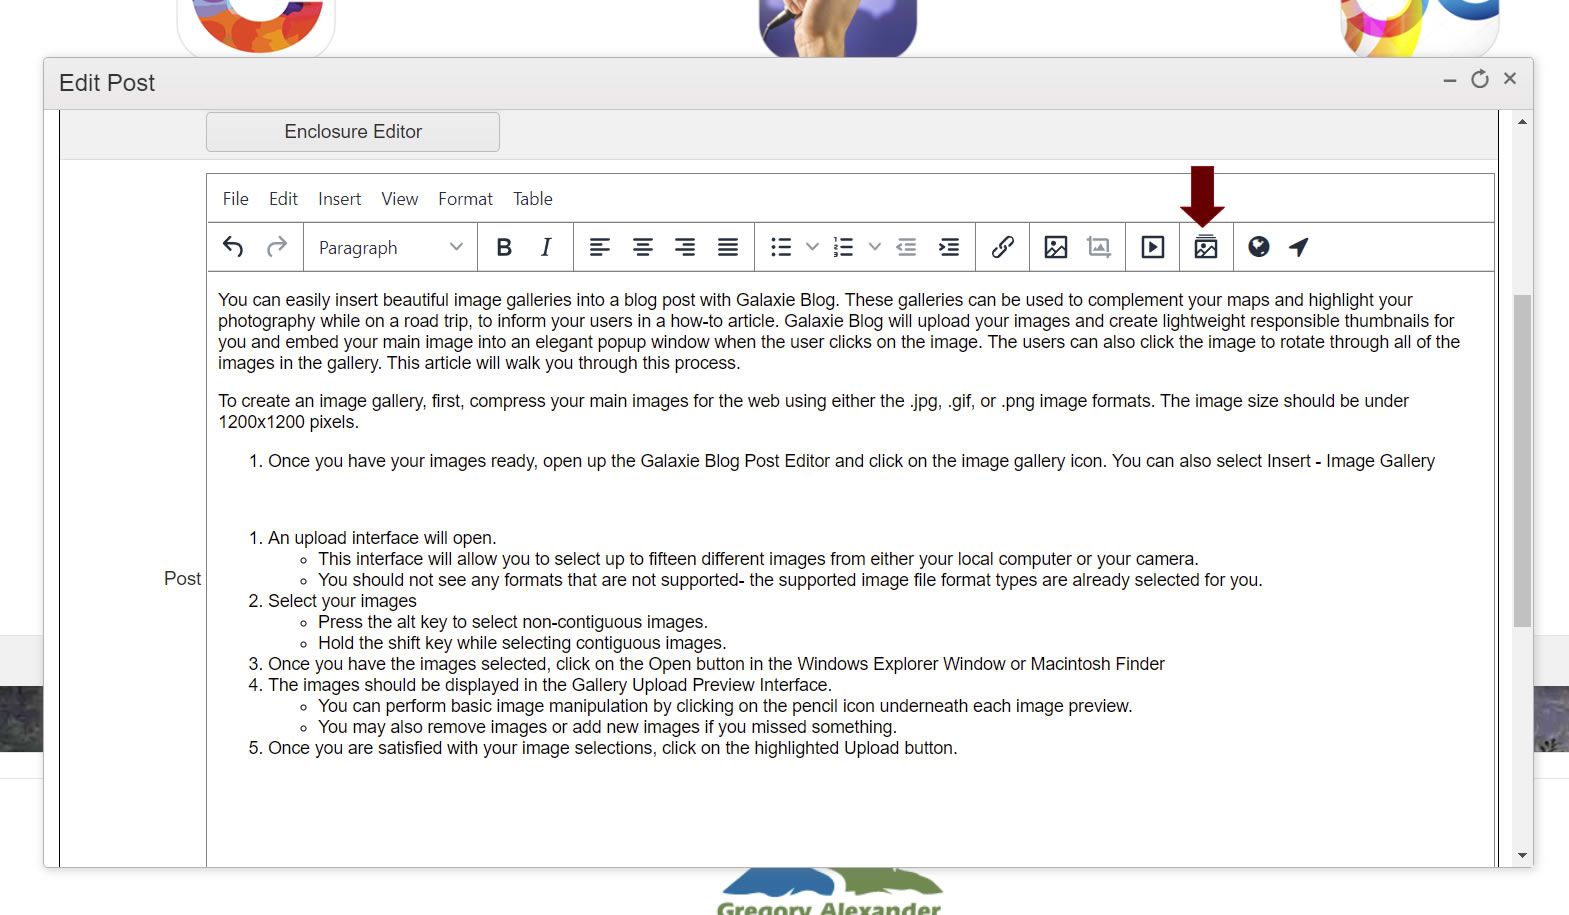
To create an image gallery, first compress your main web images using the .jpg, .gif, or .png image formats. The image size should be under 1200x1200 pixels.
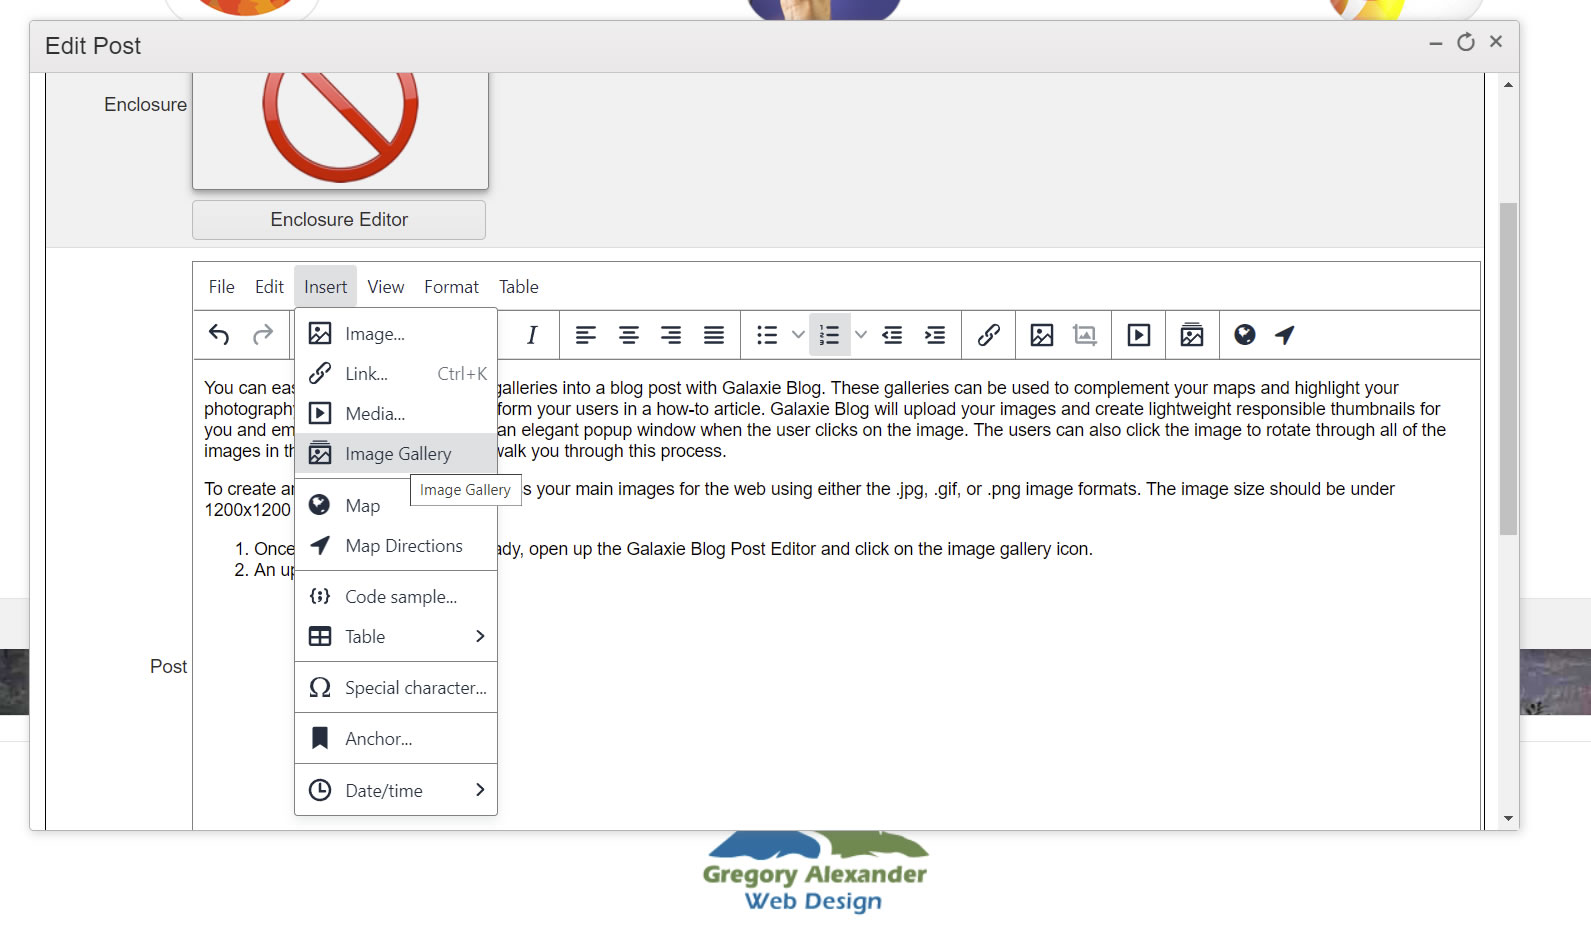
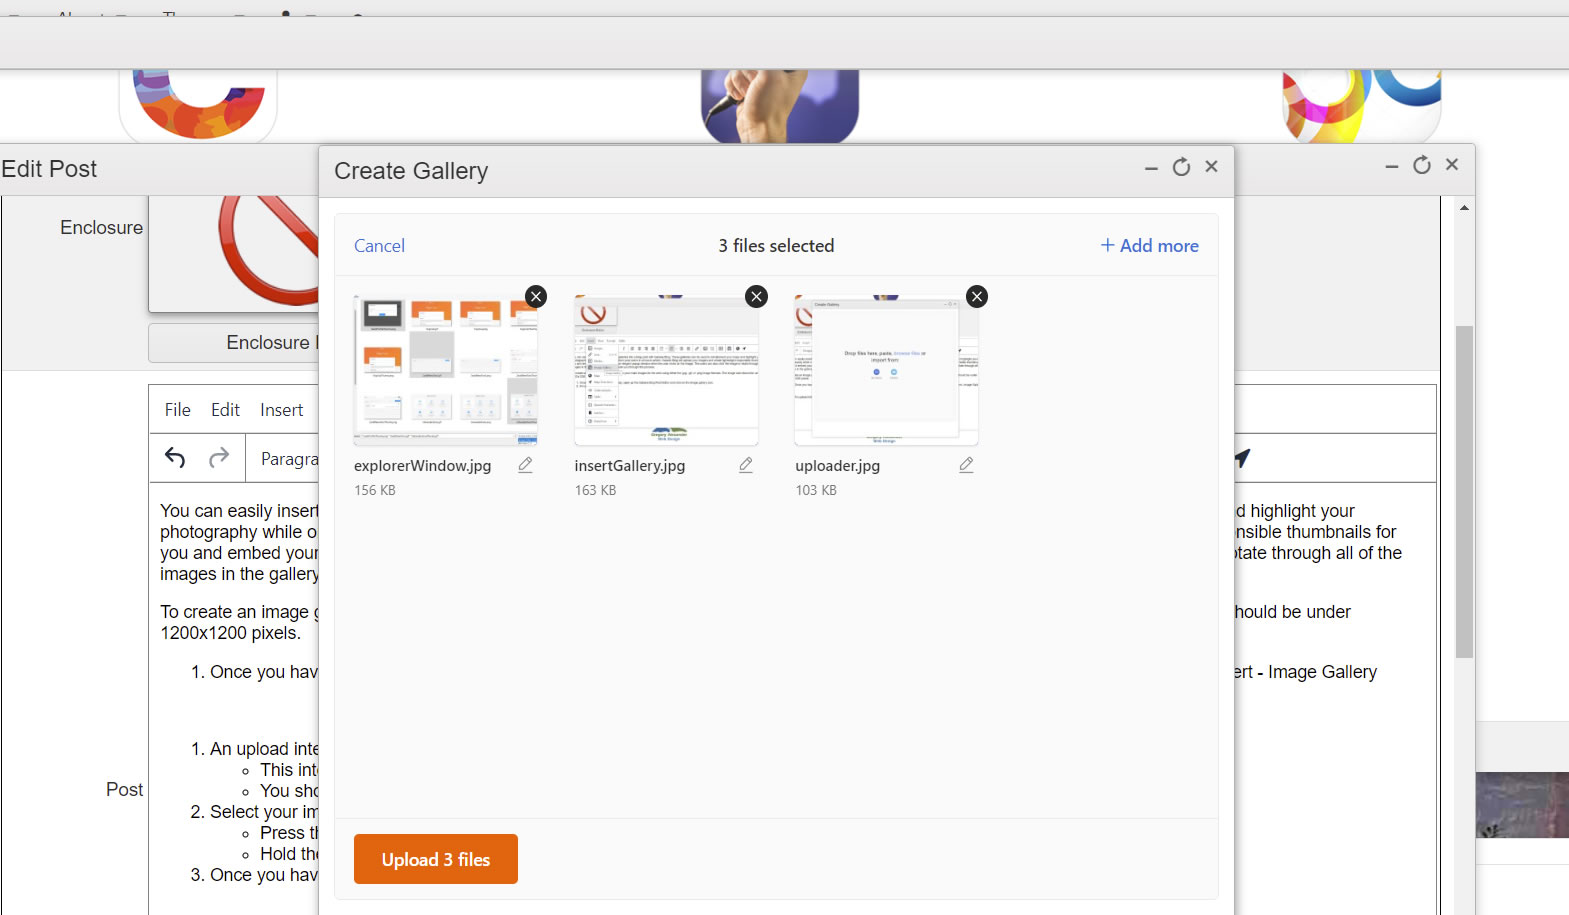
- Once your images are ready, open the Galaxie Blog Post Editor and click the image gallery icon. You can also select Insert - Image Gallery
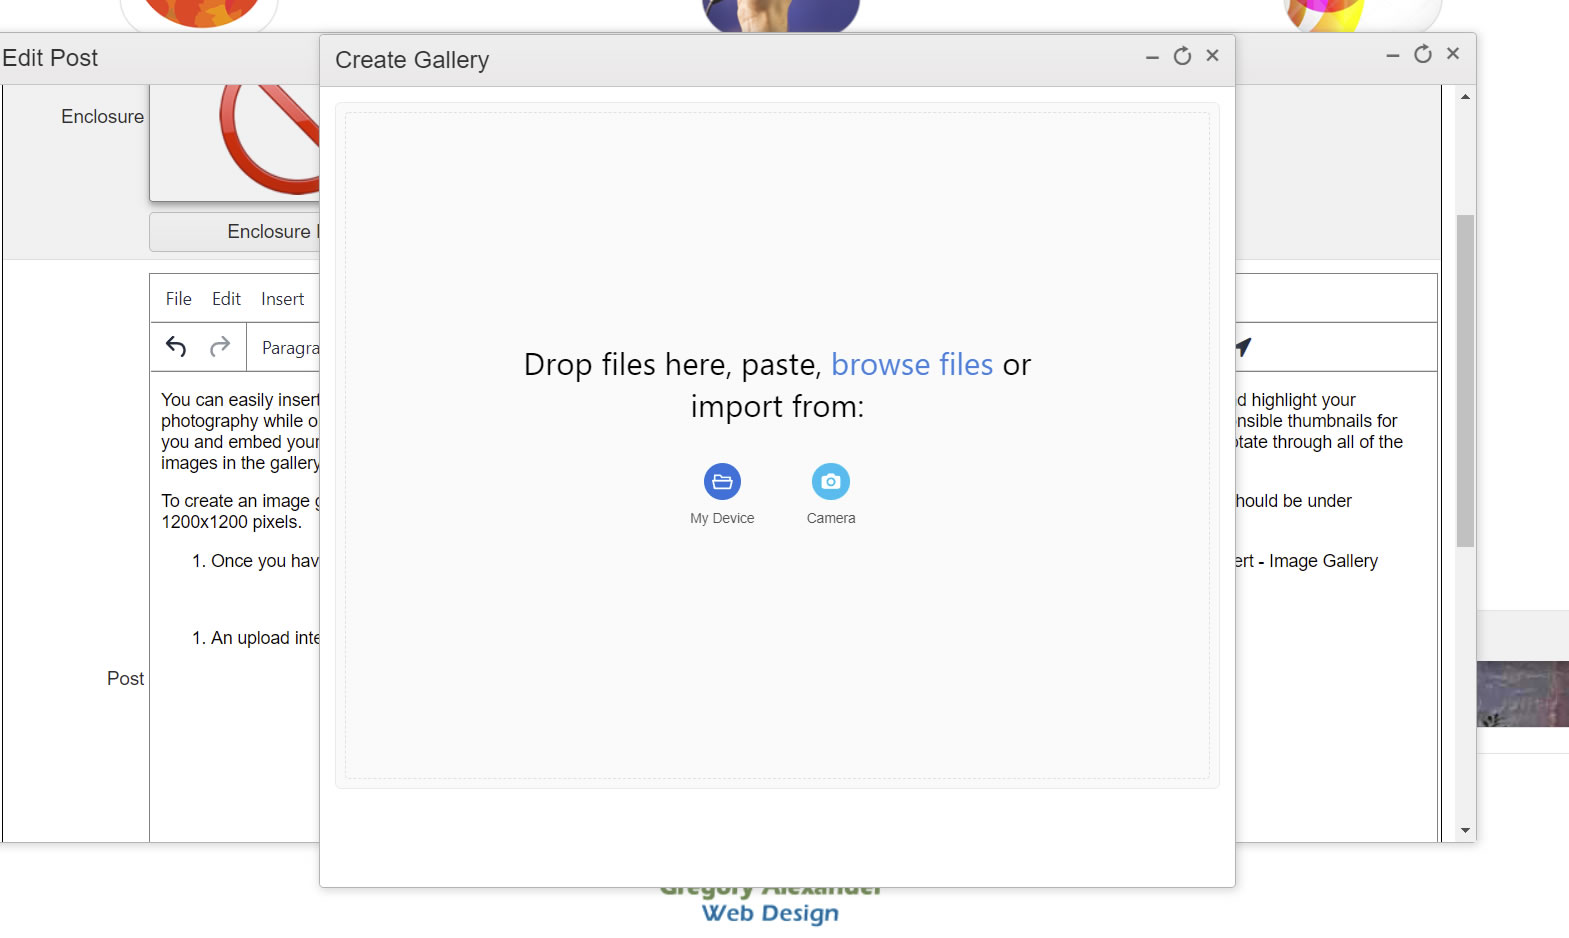
- Galaxie Blog's multi-file upload interface will open.
- This interface will allow you to select up to fifteen (15) different images from either your mobile device/local computer or your camera.
- You can drag and drop the images onto the editor or select them using your system's native finder.
- You should not see any formats that are not supported—the supported image file format types have been selected for you.
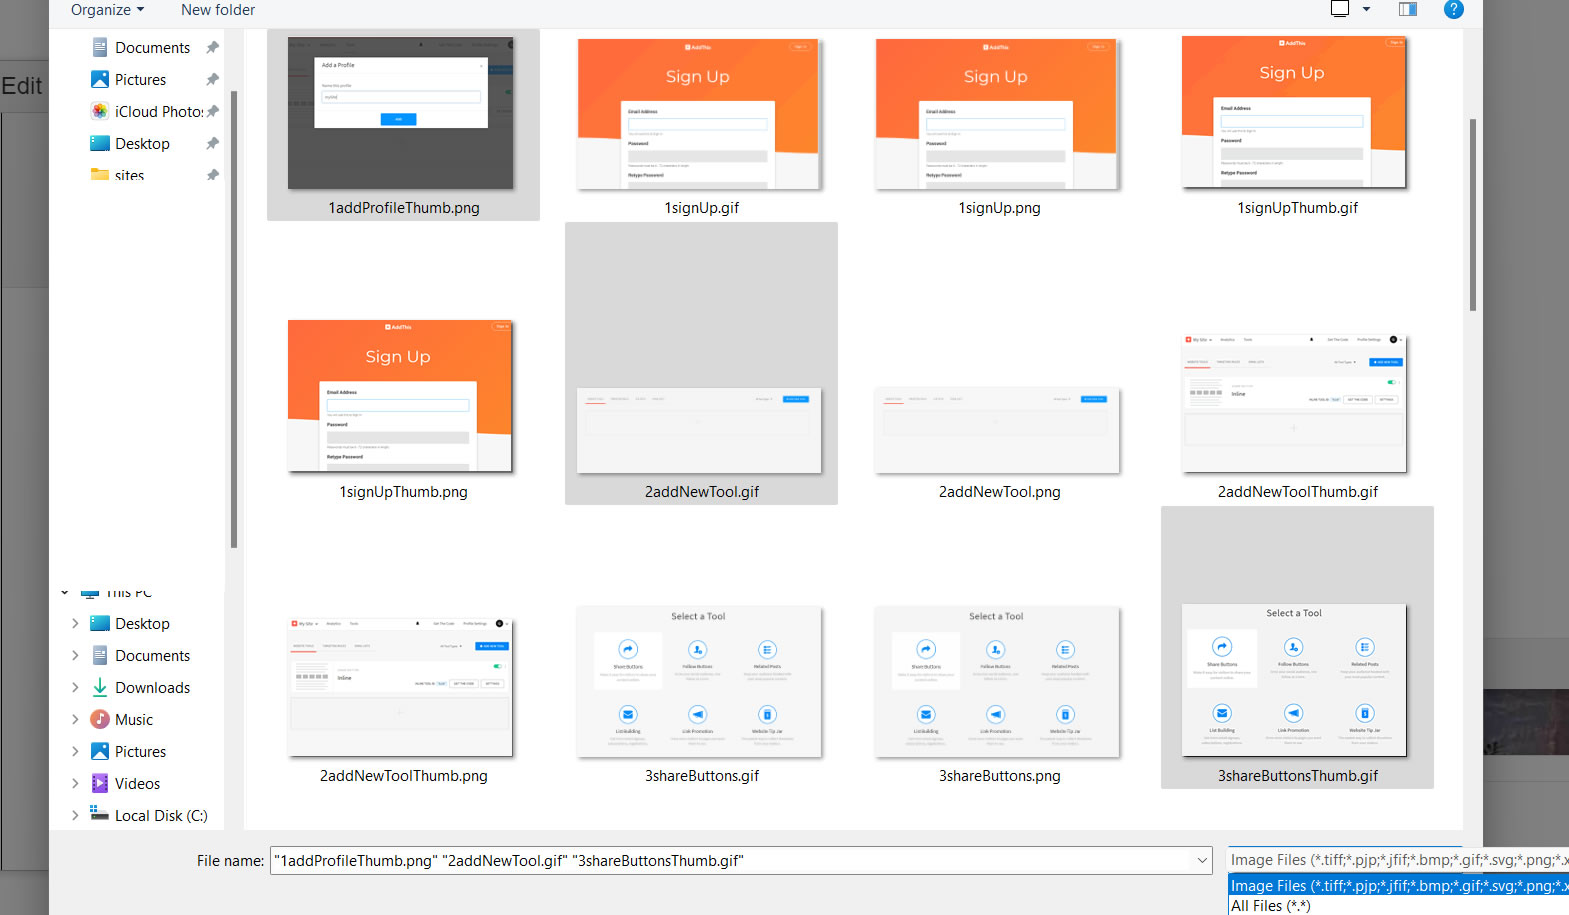
- Select your images
- Press the alt key to select non-contiguous images.
- Hold the shift key while selecting contiguous images.
- After selecting the images, click on the Open button on your mobile device, or Windows Explorer Window/Macintosh Finder
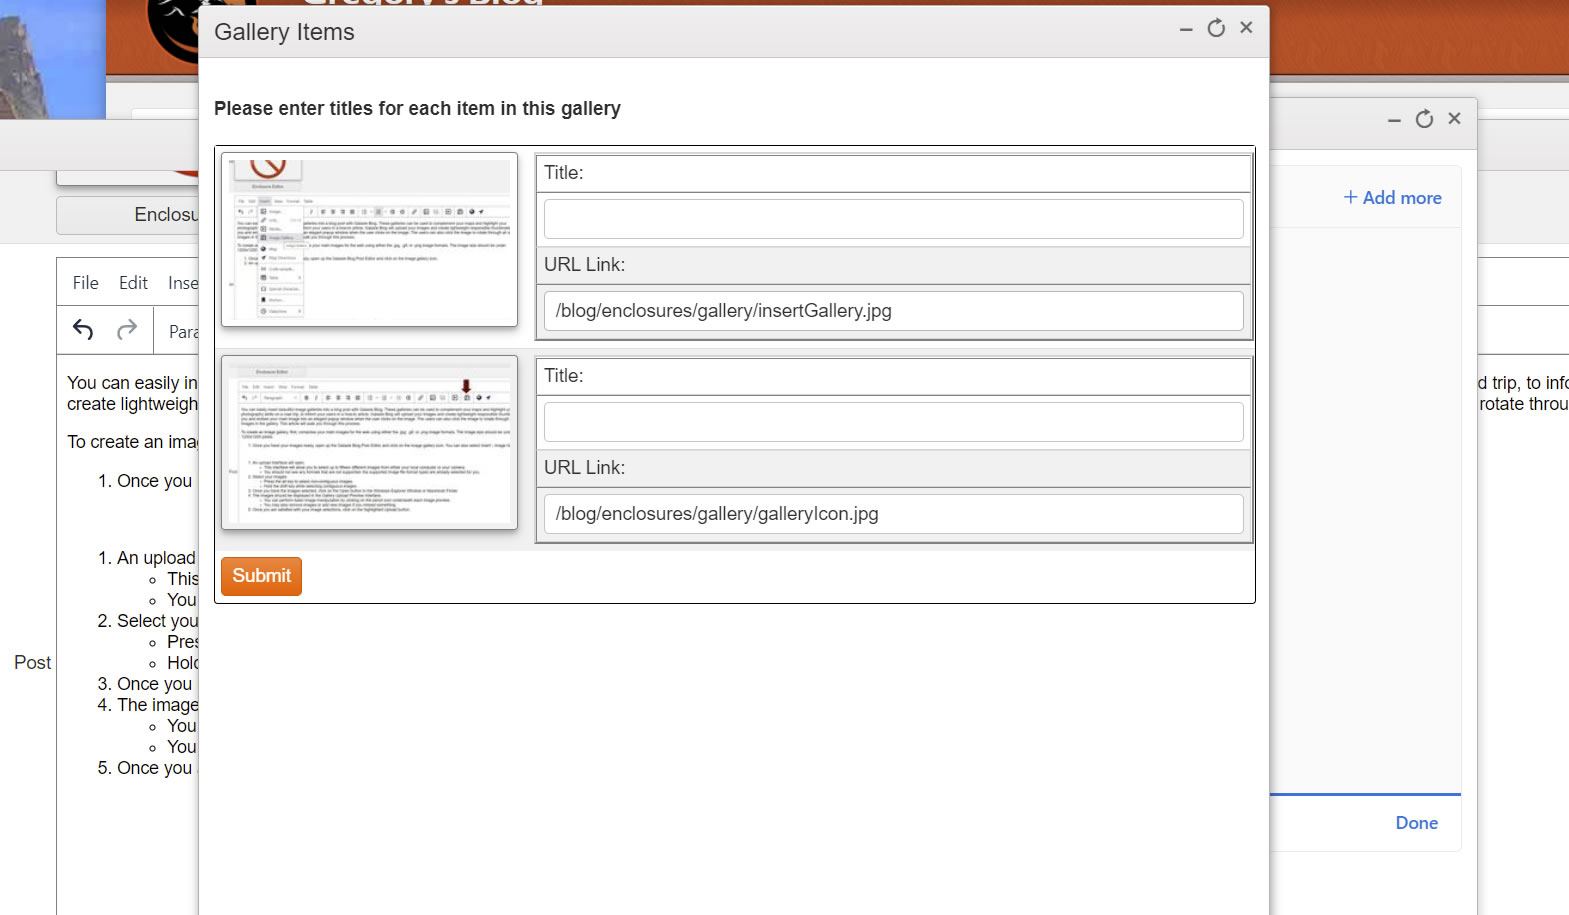
- The images should be displayed in the Gallery Upload Preview Interface.
- You can perform basic image manipulation by clicking on the pencil icon underneath each preview.
- You may also remove images or add new images if you missed something or locate images in a different directory.

- After you are satisfied with your image selections, click the highlighted Upload button.
- After clicking on upload, you should see a 'Please wait' dialog and the progress of your uploads.
- After the uploader uploads the images, your new gallery will be displayed in the post editor.
- You may create as many image galleries as you want on the page.
- Note: you cannot change the order of the images in the post editor on this page, as the individual images are embedded within an Iframe. To change the order, click on the submit button and re-edit the post, and you can move the individual images around.
- Submit your post, and your galleries should be saved.

Related Entries
Tags
Insert/Edit Image InterfaceThis entry was posted on May 1, 2022 at 2:42 PM and has received 940 views.