Galaxie Blog HTML5 Grid Interfaces
|
May 13 |
Galaxie Blog uses a customized version of jsGrid, a lightweight client-side data grid, to find and edit records when administrating the blog. These grids support grid operations like inserting, filtering, editing, deleting, paging, and sorting records, and they are fully customized to match the Galaxie Blog themes. JsGrid has no license restrictions, is fully open-sourced, and uses the MIT license.
There are many integrated grids in the Galaxie Blog Administrative site. These grids manage:
- Categories
- Comments
- Fonts
- Posts
- Subscribers
- Themes
- Users and user login history
Table of Contents
Grid Features
This customized version of jsGrid differs from the official version and has been heavily customized to match the Galaxie Blog themes.
Sorting
The grids can be sorted, and most columns support search operations. To sort a column, click on the column header at the top of the grid.
Searching
The search capabilities are available by typing in a string right underneath the column header and clicking on the search icon in the grid control to the right. The case-insensitive search will match any word you type into the search field. For example, 'Greg' will match 'Gregory.' This is useful for finding records you want to edit—type in one or two words for the text you want to see.
Opening up the Detail Interfaces From the Grid.
Most of the grids are used to display interfaces to edit the detail record. For example, you can pull up a post you want to edit. To open up the detail interface, click on the links within the cells to the left side of the grids. Not all grids, such as the category grid, have a link to the detail editor. Categories don't have enough metadata to support a dedicated detail interface; only the category and alias exist, and all these editing tasks can be performed within the grid.
Editing
All of the grids support basic editing. While some things require a dedicated interface, such as editing a post, some time-saving editing features are built into the grids. For example, you may quickly delete records without having to click on a link to open up a separate interface to delete something.
To quickly perform edits in an editable column in the grid, click on the edit button at the far right end of the row. The editable fields will be displayed after clicking the edit button. Change the value of one of the fields, and click on the checkmark button to save the record. This is a speedy process; you can immediately move to the next record you want to edit.
Deleting Records
Most of the grids allow you to delete records. Don't be afraid of accidentally hitting the trash can icon, which will delete something- you will always receive confirmations before Galaxie Blog deletes anything.
Galaxie Blog Administrative Grids
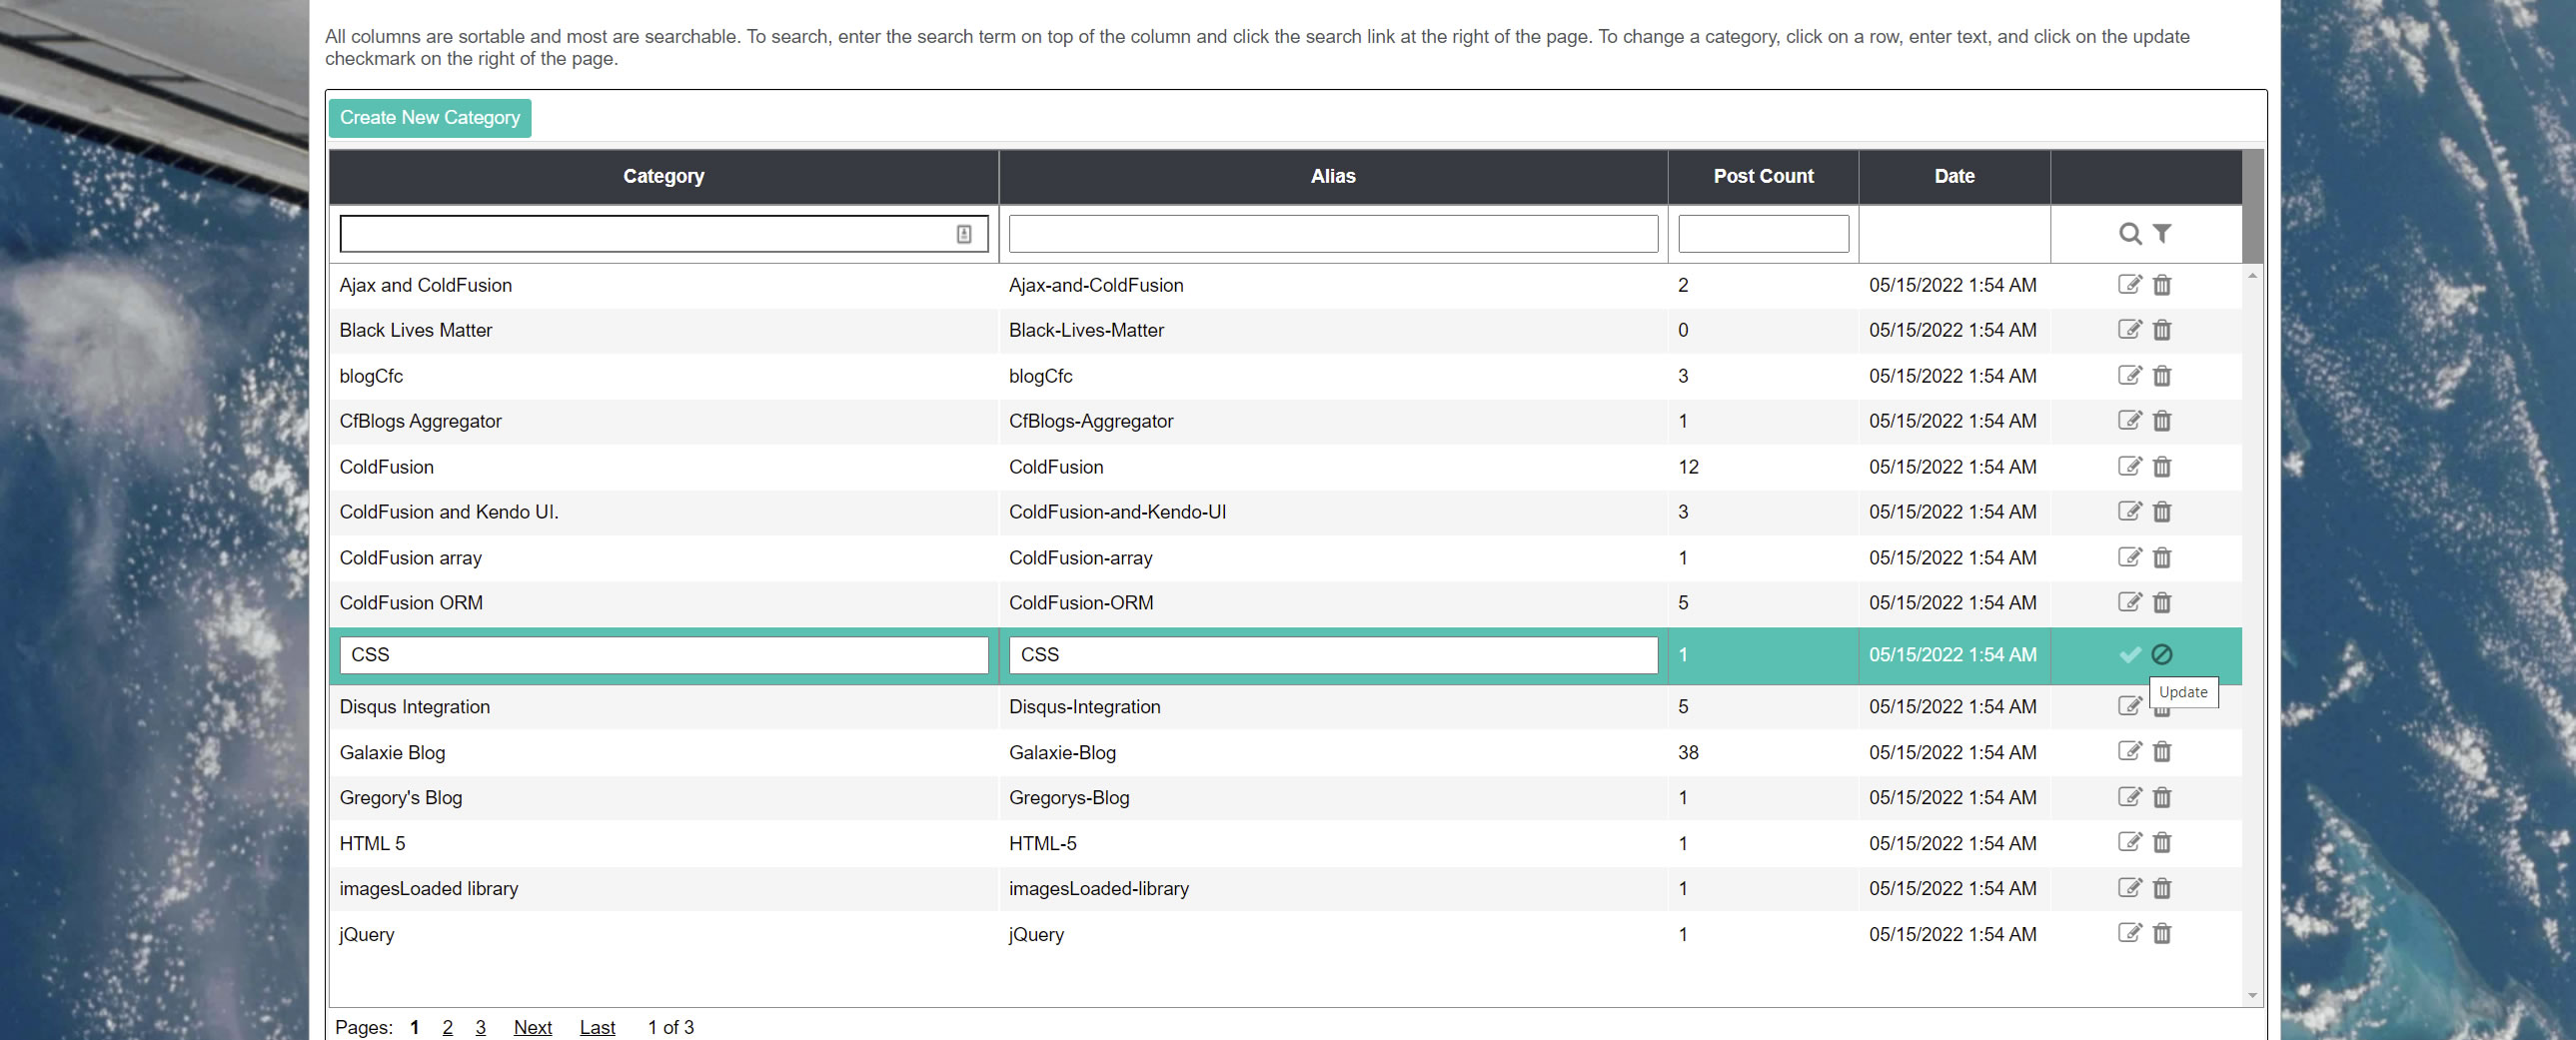
Category Grid
The Category Grid is used to create and manage existing categories. These categories are used to help categorize your posts.
Adding a new category is easy, click on the Add Category button, type in a category, and click submit.
The Category Grid contains the following categories: Category, Alias, Post Count, and Date. The category alias is the link that will be shown in the URL. All of the columns are sortable and searchable.
This grid has no links to pull up a category detail interface.
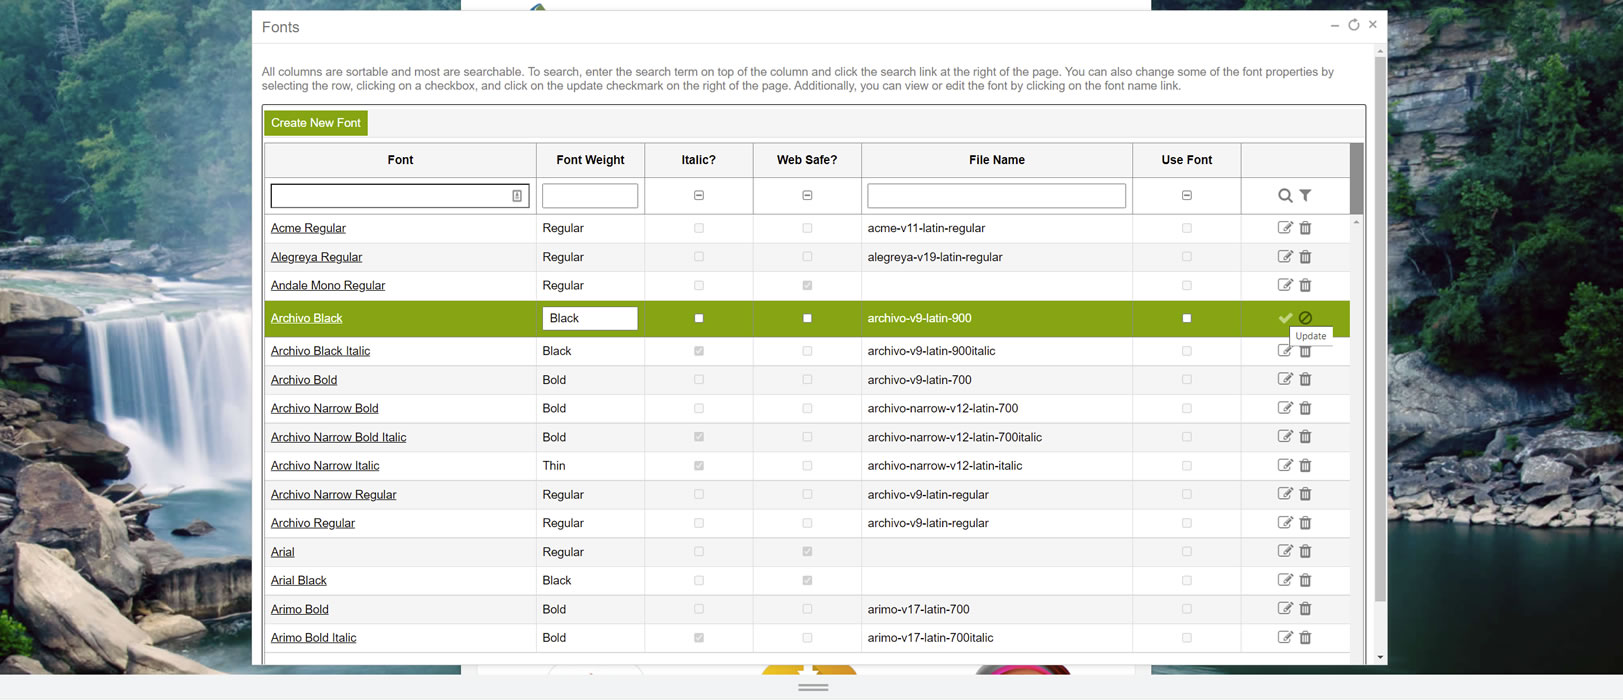
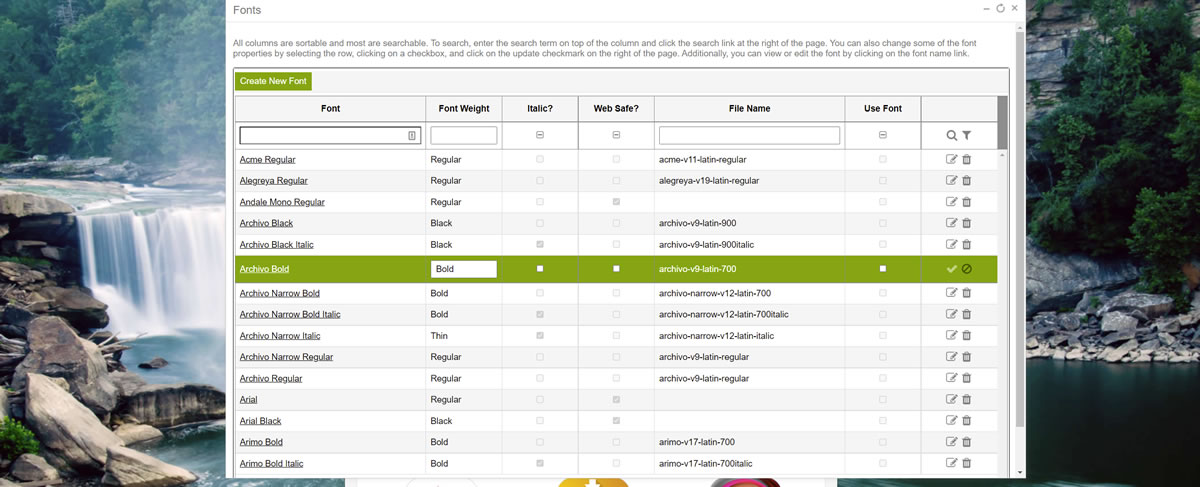
Font Grid
The Font Grid is used to manage and create new fonts. There are many font properties, and most of the time, you will either create or find a font to open the Font Detail Interface.
To create a new blog font, click on the Add New Font button and follow the directions on the screen, or see How to Create New Fonts below.
Currently, we only support woff2 font uploads. This interface will be improved in upcoming versions to support more font types. We also intend to support Google fonts in the future.
The font name, weight, italic, websafe, and use font columns are editable. Other than the Use Font checkbox, all other fields are used for display purposes. We will explain the Use Font functionality below.
The Web Safe Font checkbox determines if this font is web-safe and available across all browsers. Clicking on this checkbox will activate the font in the Post Editor. Be sure it is a web-safe font; however, if not, there will be browser errors.
A font can be assigned to the page body, the title header, and the menu script at the top of the page. Fonts can also be used when making a post in the post editor. Before assigning a font to a content block, you can preview the font by opening the Font Detail interface.
If you have assigned a font to a content block using the theme interface, you don't need to load the font in your code; it will load automatically.
If you want a non-web-safe font not assigned to a content block to be available in the Post Editor, click the 'Use Font' checkbox to load the font automatically. However, be aware that loading too many fonts will slow the page down as they consume resources to load.
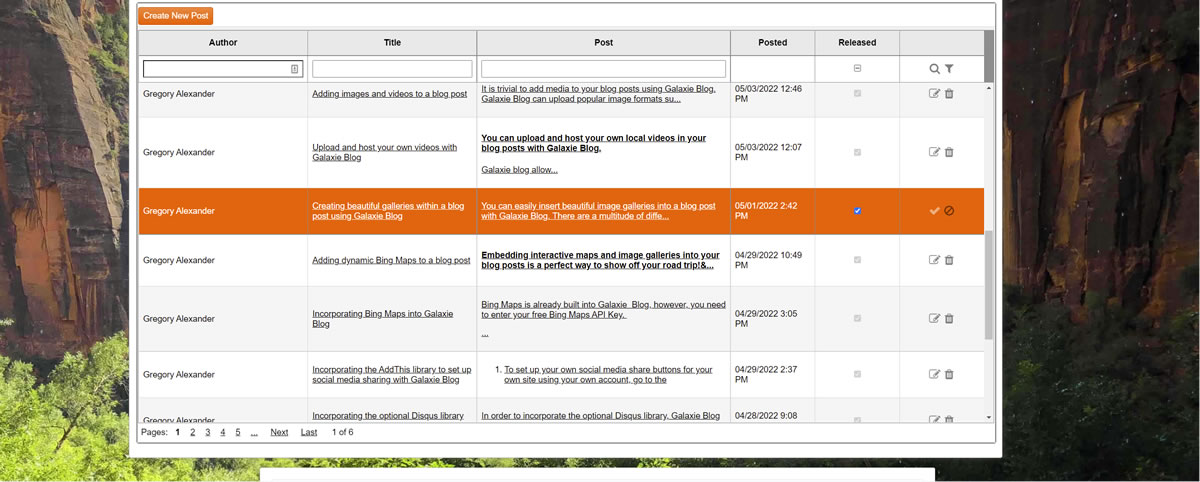
Post Grid
The Post Grid will be the grid you will most likely use while administrating your blog site.
To add a post, click the Add New Post button within the grid or the Administrative site, select a date and time, choose the author, type in the title and description fields, and click submit.
The Post Grid contains the following columns: Author, Title, Post, Date Posted, and Released.
The search functionality will be used quite a bit here. Like all grids, typing in one or two words in the Title or Post search field will retrieve all records that match the search words. Searching the Post column, for example, will search all the post contents.
You can edit the Released property by clicking on the checkbox. Releasing a post will make it public.
To open up the Edit Post Interface, click on one of the links in the Post or Title columns.
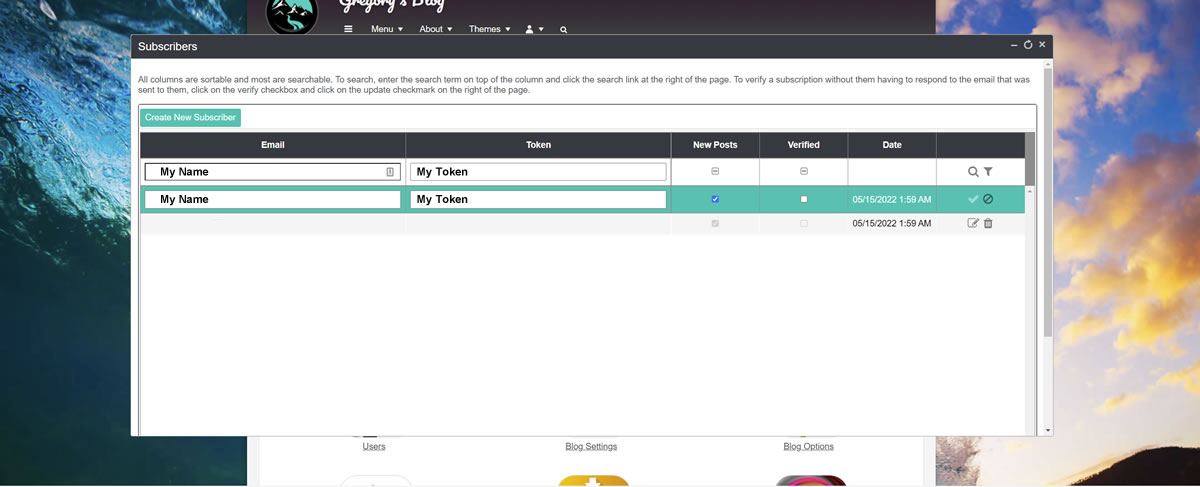
Subscriber Grid
The Subscriber Grid displays and edits your subscribers. A detailed interface is not needed here.
The email, token, and verified columns are editable.
When users subscribe to your blog, they are sent an email asking them to confirm their subscription. This is known as a 'double opt-in' and is a recommended practice. Once the user confirms via email, the Verified checkbox will be checked.
However, the blog administrator can automatically verify the subscribers by clicking the verified checkbox. This feature is available because sometimes the subscribers provide their email addresses in person or ask the administrator to subscribe for them.
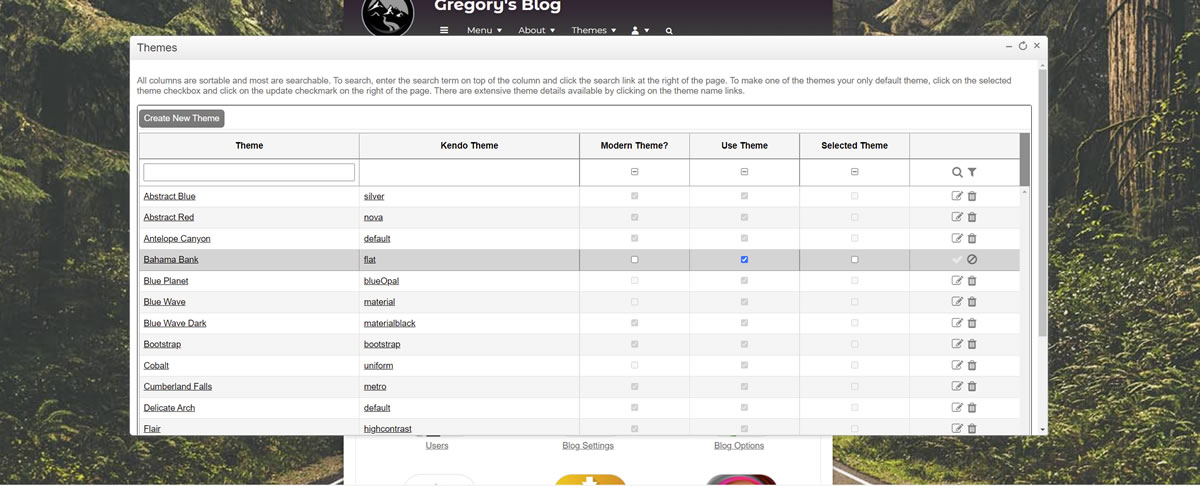
Theme Grid
The Theme Grid is mainly used to edit the theme details using the Theme Settings Interface. Click on the link in the Theme Name column to open this interface.
To create a new theme, click the New Theme button at the top of the grid.
The Edit Theme Interface will be displayed. You will be asked to enter a new theme name and select one that matches the theme you want to create.
When selecting the theme you want to start from, pay attention to the primary colors of the buttons, logos, and the color at the top of the blog post calendar icons when copying an existing theme. You will want to try to match these primary accent colors when choosing new backgrounds and Logos for your new theme.
Once you have entered the new theme name and selected the current theme, click the submit button to open the Edit Theme Setting interface. This interface will be covered in future posts.
The grid's Modern Theme, Use Theme, and Selected Theme columns are editable.
The Modern Theme checkbox sets the theme type. The modern theme removes the sidebar to the right of the blog and condenses the content in the center of the page. If this is unchecked, the theme is the classical theme type. Classic themes are helpful when you want advertisements displayed on the right side of your page.
Use Theme will make the theme available to a blog post and be available in the menu. Unchecking this checkbox will remove the theme from the blog.
To make one of the themes your default theme, click on the selected theme checkbox. Themes enabled with the Use Theme checkbox will still be available on the menu at the top of the page.
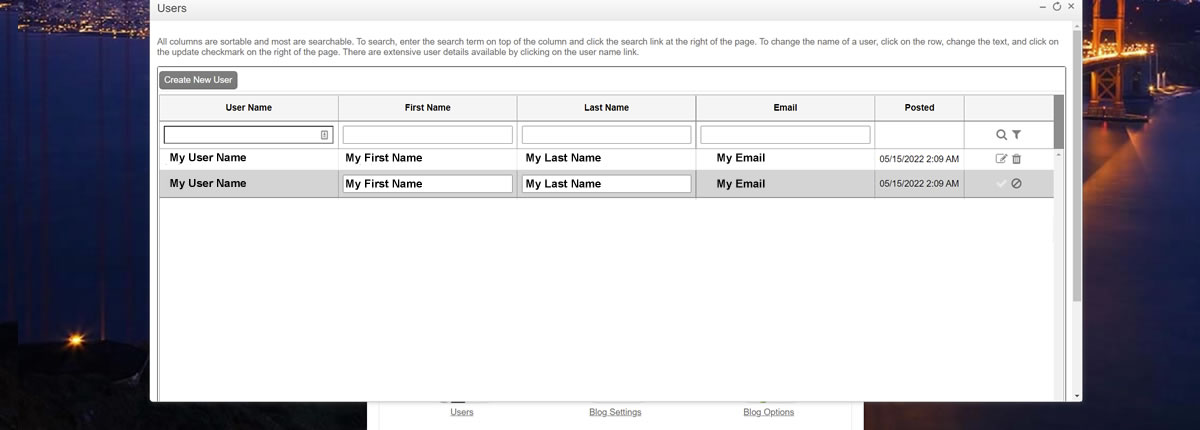
Users Grid
The users' grid is used to create and edit users.
To create a new user, click the Create New Users button at the top of the grid.
You must enter the user's information, such as their name and email address. The password that you set will not be the user's eventual password. It only logs users in once they initially receive an automated email.
Once a new user has been made, a branded email will be sent to the user asking them to fill out their user profile and select their password. The latest user must also answer secret questions like their favorite pet and place. These questions are only used if the user forgets their password. The user's password or answers to the questions are unavailable to the blog administrators.
You will also set the new user's intended role. In future blog posts, we will discuss various built-in Galaxie Blog roles.
You can use the grid to set the first and last names of the user.
To view or edit user details, click on the link in the user name to open up the Edit User Interface.
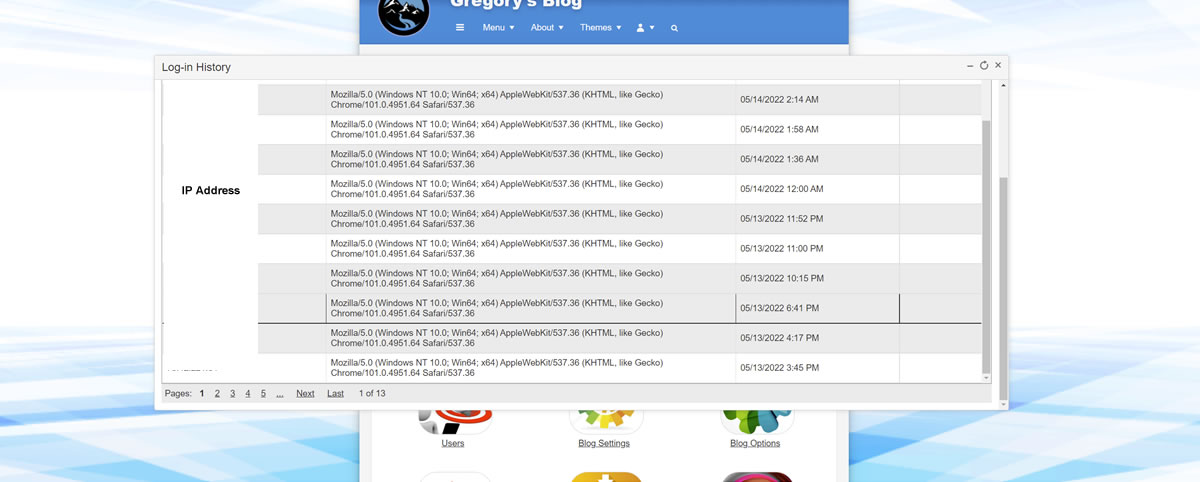
Login History Grid
Blog Administrators can view the user's login history. This grid will display the user's IP Address, User Agent, and the date and time they logged in. It is mainly used to determine whether there may have been a security intrusion. There are no editable fields or detail pages associated with this grid. Only the selected user and users with the blog administration role can view this grid.
Tags
Galaxie Blog Administrative Grid InterfacesThis entry was posted on May 13, 2022 at 10:29 PM and has received 919 views.