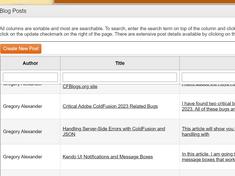
A Comprehensive Look at the Kendo Window
|
Jul 15 |

In this article, I will walk you through using the Kendo Window, share some tips and tricks, and show you how to create a dynamic server-side window with ColdFusion.
Table of Contents
- What are the Benefits of a Windowing Interface?
- What are the Disadvantages of a Web-based Window?
- Introducing the Kendo Window
- Implementing the Kendo Window on the Client Side
- Client Side Code
- Create a JavaScript Function to Send Arguments and Open up the Kendo Window
- Destroy All Prior Instances of the Kendo Window
- Set the Kendo Window Properties by the ID that was Passed In
- Append the Window Container Div to the Body
- Initialize the Kendo Window and Set the User Action Properties
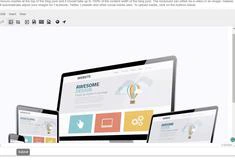
- Set the Kendo Window Content
- Closing the Kendo Window
- Center the Kendo Window
- Kendo Window Logic on the Server Side
- Using HTML to Open the Window
- Using Server-Side Logic to Create a Listener to Open the Window with a URL
- Real-World Examples Using this Code
- Further Reading
What are the Benefits of a Windowing Interface?
The main benefit of a window-based interface is that it allows the users to perform multiple tasks simultaneously. In a web-based interface, you can have many web interfaces (or applications) in various windows. For example, in the Galaxie Blog administrative interface, every post editor has a window launched by clicking on a list of posts in an HTML5 grid interface. Nearly every single administrative interface opens up in a window. Having different information available in multiple windows has several advantages; for example, you can copy the content from one post to another or research the current post you are creating by looking at prior posts. Once you're done with the research, all the windows you open can be minimized and shoved out to maximize your working space.
Windows Conserve Working Space
Every window can be configured programmatically to take up a specific size. The windows can be minimized, resized, moved around the screen, refreshed, and closed. One effective design is to use an HTML5 grid, such as Kendo UI Grid, that opens a new window displaying the details when they click on a row within the grid. This design allows your users to open multiple windows and compare the details of the windows side by side.
Windows are Aware of the Current Application State
If you're using a server-side language, such as ColdFusion, the window content can be state-aware when the window opens. This allows you to generate state-aware content on the fly without reloading the entire page.
To illustrate, in Galaxie Blog, to properly render the UI elements for Apple tablets, I capture the user's screen size using Javascript when the user first hits the blog page. However, since the DOM was loaded at the same time the cookie was set, I typically don't have access to this information. However, a window will have access to this information as it is initialized after the DOM is loaded, and we can adjust the window size to match the client's end device.
What are the Disadvantages of a Web-based Window?
Potential SEO Issues
Depending on the structure of your content, Google may not index the window as the content may not be initially loaded into the DOM. Google may also penalize your window if it constantly pops up on the page. If you use a window, especially if it is modal, be careful to load it as needed; otherwise, the window will be considered intrusive, and you may be penalized.
Without a Custom Listener, the Window Lacks a URL
A URL is helpful for SEO purposes and allows users to open content using a memorizable link. However, Kendo windows typically open using Javascript functions unless you create a listener on the server side to translate the Javascript function to a URL.
I will show you how to overcome this issue in this article by creating a custom listener.
Note: these disadvantages apply to web overlays, popups, and modal windows.
Introducing the Kendo Window
The Kendo Window has multiple configuration options. You can set the minimum and maximum height and width, title, set the initial window position, determine what user actions are available, add animations, and a host of other options. We will briefly cover these options below.
Implementing the Kendo Window on the Client Side
There are plenty of how-to examples on the Telerik site for implementing a Kendo Window, but the basic code examples are missing some key details. I will share some of my working code using JavaScript and tips and tricks for optimizing the code.
Once we have walked through the code, we will discuss how to implement dynamic window content with server-side code and provide examples.
Client Side Code
If you want to see the Kendo in action while we walk through the code, click the button below. This is unnecessary as we will share the entire code below, but it will allow you to view the entire client-side code side by side while we review the individual parts of the code.
Here is the full client-side code. We will walk through the essential elements of the code below.
// About window -----------------------------------------------------------------------------------------------
function createAboutWindow(Id) {

	// Remove the window if it already exists
	if ($("#aboutWindow").length > 0) {
		$("#aboutWindow").parent().remove();
	}

	// Set the window title
	if (Id == 1){
		var windowTitle = "About <cfoutput>#htmlEditFormat(application.blog.getProperty('blogTitle'))#</cfoutput>";
	} else if (Id == 2){
		var windowTitle = "About Gregory Alexander";//TODO put in an owner name in the admin section.
	} else if (Id == 3){
		var windowTitle = "Download Galaxie Blog";
	}

	// Typically we would use a div outside of the script to attach the window to, however, since this is inside of a function call, we are going to dynamically create a div via the append js method. If we were to use a div outside of this script, lets say underneath the 'mainBlog' container, it would cause wierd problems, such as the page disappearing behind the window.
	$(document.body).append('<div id="aboutWindow"></div>');
	$('#aboutWindow').kendoWindow({
		title: windowTitle,
		// The window can't be set to full screen per design.
		actions: [<cfoutput>#kendoWindowIcons#</cfoutput>],
		modal: false,
		resizable: true,
		draggable: true,
		// For desktop, we are subtracting 5% off of the content width setting found near the top of this template. These are custom JavaScript functions that determine the clients screen width
		width: <cfif session.isMobile>getContentWidthPercent()<cfelse>(getContentWidthPercentAsInt()-5 + '%')</cfif>,
		height: '85%',// We must leave room if the user wants to select a bunch of categories.
		iframe: false, // don't  use iframes unless it is content derived outside of your own site.
		content: "<cfoutput>#application.baseUrl#</cfoutput>/about.cfm?aboutWhat=" + Id,// Make sure to create an absolute path here. I had problems with a cached index.cfm page being inserted into the Kendo window probably due to the blogCfc caching logic.
	<cfif session.isMobile>
		animation: {
			close: {
				effects: "slideIn:right",
				reverse: true,
				duration: 500
			},
		}
	<cfelse>
		close: function() {
			$('#aboutWindow').kendoWindow('destroy');
		}
	</cfif>
	}).data('kendoWindow').center();// Center the window.

}//..function createAboutWindow(Id) {
Create a JavaScript Function to Send Arguments and Open up the Kendo Window
I typically create a JavaScript function to enable multiple windows and a dynamic ColdFusion template on the server side to allow the window logic to be reused. I am passing in an Id to set window properties. I will also use this ID on the server side with ColdFusion to determine which content to show.
function createAboutWindow(Id) {Destroy All Prior Instances of the Kendo Window
The basic Telerik tutorials do not include the following Javascript to destroy an existing window. The name of the Kendo window must be entered—here, it is 'aboutWindow'.
This logic is critical to allowing you to use multiple Kendo windows. You will have many problems if you don't include the logic to destroy current windows when using multiple Kendo windows.
// Remove the window if it already exists
if ($("#aboutWindow").length > 0) {
	$("#aboutWindow").parent().remove();
}
Set the Kendo Window Properties by the ID that was Passed In
To reuse the same code for multiple windows, dynamically set the window properties using the ID.
// Set the window title
if (Id == 1){
	var windowTitle = "About <cfoutput>#htmlEditFormat(application.blog.getProperty('blogTitle'))#</cfoutput>";
} else if (Id == 2){
	var windowTitle = "About Gregory Alexander";//TODO put in an owner name in the admin section.
} else if (Id == 3){
	var windowTitle = "Download Galaxie Blog";
}
Append the Window Container Div to the Body
Here, we are dynamically appending the div as the container for the new Kendo window. This technique is important as it prevents bugs from occurring when multiple windows are used. It also eliminates the necessity of manually inserting the div into your code.
// Typically we would use a div outside of the script to attach the window to, however, since this is inside of a function call, we are going to dynamically create a div via the append js method. If we were to use a div outside of this script, lets say underneath the 'mainBlog' container, it would cause wierd problems, such as the page disappearing behind the window.
$(document.body).append('<div id="aboutWindow"></div>');
Initialize the Kendo Window and Set the User Action Properties
The window initialization occurs in the first line of the code below.
$('#aboutWindow').kendoWindow({The kendoWindowActions ColdFusion variable sets the default user actions for the window. These actions determine what the end-user can do with the window using window controls to the right of the window title. The available actions are:
- Pin
- Refresh
- Maximize
- Minimize
- Close
I don't use the Pin action, as I found it a bit buggy. I also don't allow the user to maximize this particular window due to personal design considerations.
// The about window can't be set to full screen per design.
actions: [<cfoutput>#kendoWindowIcons#</cfoutput>],
Set the Kendo Window Content
Enter the URL of the content template you want to use in the content var. The URL must return HTML or JSON. Notice that we are also appending the 'aboutWhat 'URL parameter to the URL and passing the ID. This allows us to reuse the About window for various purposes using server-side code.
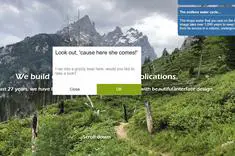
content: "<cfoutput>#application.baseUrl#</cfoutput>/about.cfm?aboutWhat=" + Id,// Make sure to create an absolute path here. I had problems with a cached index.cfm page being inserted into the Kendo window probably due to the blogCfc caching logic. Closing the Kendo Window
To add some interest in mobile clients, we will subtly slide the window from the left of the screen when we open a window. Similarly, we will reverse the slide-in animation effect when the window is closed. On desktop clients, we will destroy the window on the close event. I will cover animation effects in greater detail in a future post.
<cfif session.isMobile>
	animation: {
		close: {
			effects: "slideIn:right",
			reverse: true,
			duration: 500
		},
	}
<cfelse>
	close: function() {
		$('#aboutWindow').kendoWindow('destroy');
	}
</cfif>
Destroying Multiple Kendo Windows
If you have duplicate Kendo windows, you can destroy them all using the following line of code:
// If all else fails, destroy all Kendo windows within the body.
kendo.destroy(document.body);
Other Potential Methods to Close Kendo Windows
Unfortunately, you can't use this keyword to close the Kendo Window. However, if you don't know the name of the window, you can find the closest window. However, this does not work if you have multiple windows with the same ID.
/*  Other methods to potentially close a Kendo window:
var thisWindow = $( this ).closest(".k-window-content").data("kendoWindow");
$(thisWindow).kendoWindow('destroy');
Center the Kendo Window
Finally, center the window when it is opened
}).data('kendoWindow').center();// Center the window.
Kendo Window Logic on the Server Side
We will dynamically use the ID we passed in the URL to generate the window's content on the server.
On the server side, we will use a conditional or a switch statement that uses the URL.Id to dynamically generate window content. You can see this code in action by clicking on the About menu at the top of this web page.
Here is a summary example of the about.cfm template code:
<cfif URL.aboutWhat eq 1>
     About Gregory's Blog...
<cfelseif URL.aboutWhat eq 2>
     About Gregory Alexander...
<cfelseif URL.aboutWhat eq 3>
     Download Galaxie Blog...
</cfif>
I won't go into further detail as most of this blog readers are already familiar with server-side code.
Using HTML to Open the Window
To open the window, use a link or button that opens the function like so:
<!-- Using an href tag -->
<a href="javascript:createAboutWindow(1)">About Gregory's Blog</a>
<!-- Button example -->
<button id="about1" name="about1" class="k-button k-primary" onclick="javascript:createAboutWindow(1);"><span class="fa-solid fa-up-right-from-square fa-2xs"></span> About Gregory's Blog</button>
Using Server-Side Logic to Create a Listener to Open the Window with a URL
One of the disadvantages of the Kendo window is that you typically can't open it with a friendly URL. This may have negative implications for SEO, and it is hard for your users to memorize a vital link that opens up content within a window.
However, you can use server-side logic to create a listener invoking the JavasScript function via a URL. There are multiple ways to achieve this, but I use this simple implementation with ColdFusion to open a window using a friendly URL.
<script>
<cfif isDefined("URL.about")>
	createAboutWindow(1);
</cfif>
</script>
After the page loads, the URL https://www.gregoryalexander.com/blog?about will open up the 'About Gregory's Blog' Kendo window.
Real-World Examples Using this Code
Further Reading
- Kendo Window Basic Example (Telerik)
- Window Overview (Telerik)
- Window API Reference (Telerik)
- Kendo FX (Telerik animation effects)
Related Blogs
Tags
ColdFusion and Kendo UI


|
|
|
|
Hi, my name is Gregory! I have several degrees in computer graphics and multimedia authoring, and I have been developing enterprise web applications for the last 25 years. I love web technologies and the outdoors and am passionate about giving back to the community. |
|
This entry was posted on July 15, 2022 at 12:53 AM and has received 6655 views.
Comments
There are 0 comments.