Using Kendo UI Windows to Implement Multi-Step Web Interfaces
|
May 15 |
In this article, I will show you how to use the Kendo Window to create sophisticated multi-step interfaces. We have already seen the benefits of a windowing interface in our previous A Comprehensive Look at the Kendo Window article. Here, we will expand on this topic and show you how to use the Kendo Window to implement sophisticated multi-step interfaces.
This multi-step interface technique is a loosely coupled, straightforward, and widely adaptable model. Each interface is fully contained within the window object, which only expects a single ID with three optional generic arguments and has no other dependencies. However, AJAX or other asynchronous APIs are necessary when data needs to be processed.
This interface design is quite adaptable and can be used for many different purposes- I have hundreds of interfaces in the Galaxie Blogs administrative site using this approach.
Table of Contents
Demonstration Example
The following example is a Kendo Window-based multi-step implementation with three major sub-interfaces:
- An Uppy-based interface to upload one or more images
- A custom form to enter data to create a carousel or image-based gallery
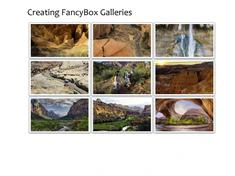
- The resulting Swiper-based carousel or Fancy Box Gallery, depending upon the choices made in the previous interface
This multi-step interface loosely mimics the Galaxie Blogs Uppy uploader, gallery, and carousel interfaces.
When Necessary, Use Asynchronous APIs to Process Data
If processing data, you should use AJAX or another asynchronous API to process data to keep the logic self-contained. The validation logic should also be kept within the Kendo Window before moving to the next interface.
In the following example, on the first Uppy interface, we use Uppy's XHR method to upload the images to the server. Once the upload is successful, we use the onSuccess method to extract the image IDs processed on the server. We also capture the users' selections on the second interface and pass them to the server using AJAX before finally rendering the carousel or image gallery. In this example, the final carousel and gallery interfaces do not need further processing, so AJAX is unnecessary.
Client-Side JavaScript to Open the Windows
The following client-side methodology is the same as the previous Comprehensive Look at the Kendo Window article. However, since we use a multi-step process, we must add logic within the JavaScript function to set the window name, title, and dimensions for all windows used in the interface.
The following script requires a single argument, the ID, to determine window content. The other three generic arguments, optArgs, otherArgs, and otherArgs1, are optional and can be used to extend the functionality of individual windows. These extra arguments are intentionally vague, allowing you to use them for different purposes.
The content argument specifies the Kendo Window content. Here we are using the customInterface.cfm ColdFusion template and pass the ID, optArgs, otherArgs, and otherArgs via the URL.
Finally, we destroy the dynamic Kendo window when the close method is invoked and terminate the JavaScript function.
// Custom window logic to open the custom window
function createCustomInterfaceWindow(Id, optArgs, otherArgs, otherArgs1) {
	/* Note: The ID is the windowId, and optArgs is generally the postId. These arguments were meant to be generic. */
	// Initialize non required args
	otherArgs1 = typeof otherArgs1 !== 'undefined' ? otherArgs1 : '';

	if (Id == 45){
		var windowName = "kendo-windows-with-multistep-processes";
		var windowTitle = "Uppy Uploader";
		var windowHeight = "640px";
		var windowWidth = "640px";

	} else if (Id == 46){
		var windowName = "Multi-Step-Kendo-Window";
		var windowTitle = "Create Carousel or Gallery";
		var windowHeight = "75%";
		var windowWidth = "85%";

	} else if (Id == 47){
		var windowName = "Carousel";
		var windowTitle = "Carousel";
		var windowHeight = "75%";
		var windowWidth = "85%";

	} else if (Id == 48){
		var windowName = "image-gallery";
		var windowTitle = "Image Gallery";
		var windowHeight = "75%";
		var windowWidth = "85%";
	}

	// Typically, we would use a div outside of the script to attach the window to. However, since this is inside a function call, we will dynamically create a div via the append js method. If we were to use a div outside of this script, underneath the 'mainBlog' container, it would cause weird problems, such as the page disappearing behind the window.
	$(document.body).append('<div id="' + windowName + '"></div>');
	$("#" + windowName).kendoWindow({
		title: windowTitle,
		// The search window can't be set to full screen per design.
		actions: ["Minimize", "Pin", "Refresh", "Close"],
		modal: false,
		iframe: false,
		resizable: true,
		draggable: true,
		// For the desktop, we are subtracting 5% off of the content width setting found near the top of this template.
		width: windowWidth,
		height: windowHeight,// We must leave room if the user wants to select many categories.
		iframe: false, // don't use iframes unless it is content derived outside of your site.
		content: "/blog/includes/windows/customInterface.cfm?interfaceId=" + Id + "&optArgs=" + optArgs + "&otherArgs=" + otherArgs + "&otherArgs1=" + otherArgs1,// Make sure to create an absolute path here. I had problems with a cached index.The cfm page is being inserted into the Kendo window, probably due to the blogCfc caching logic.

		close: function() {
			$("#" + windowName).kendoWindow('destroy');
		}

	}).data('kendoWindow').center();// Center the window.

}//..function createCustomInterfaceWindow(Id, optArgs, otherArgs, otherArgs1) {
Refreshing and Closing Kendo Windows
To close a window, use the window name using jQuery block like so:
$('#carousel').kendoWindow('destroy');To refresh a Kendo Window, use:
$("#carousel").data("kendoWindow").refresh();We can also use these methods to communicate between active Kendo Windows. For example, you can close the preceding window interfaces when you are completed processing something in another window.
Server Side Logic
The customInterface.cfm template can access all ColdFusion session and application variables and the variables we passed via the URL. We will break up this template into sections using case statements from the ID we passed via URL. Nothing is unique to ColdFusion; we could achieve the same objective using any web server language. I have eliminated most of the code as it is not necessary.
The logic is divided into four sections separated by the ID. For the examples below, I removed all of the code besides some code artifacts showing you how to use the URL variables and interact with different windows.
The First Uppy Uploader Window
The first Uppy window, using the ID of 45, allows the user to upload images using a Uppy file uploader interface. It contains the Uppy configuration code in the Implementing Client Side File Uploading with Uppy article.
You may question why I started with ID 45. I have coded 44 different prior demonstration interfaces that use this same template! I typically reuse the same templates for scores of various interfaces, allowing me to reuse the same template without writing a new function for each Kendo Window. This also allows me to place common logic at the top of each interface template for code reuse.
Once Uppy is finished uploading images to the server, the code saves the new image IDs inserted into the database into a imageIdList hidden input, which we will use to populate the other's argument.
Finally, we use the following to invoke the createCustomWindow script passing the ID of 46, passing the current post Id of 4172 as the optArgs property, and populate the otherArgs with the values of the imageIdList, which we just populated.
// Example script
createCustomInterfaceWindow( 46, 4172, 1_2_3);
The Second Widow Prompts the User for Information
The second window provides a radio box to allow the user to render the uploaded images to create an image gallery or carousel.
If a carousel is chosen, the user must select the font, effect, and shader. If an image gallery is chosen, the user must enter the title, body, and font color for image galleries.
This window takes the ID values passed in the optArgs and queries the database to show the uploaded images.
<!---  Replace the underscore with a comma so we can use it in the query below. --->
<cfset imageIdList = replaceNoCase(URL.otherArgs, '_', ',', 'all')>

<!--- Get the data from the db --->
<cfquery name="getImageUrl" datasource="Demo">
	SELECT
		ImageId as ImageId,
		ImagePath as ImagePath,
		ThumbnailPath as ThumbnailPath
	FROM Image
	WHERE ImageId IN (<cfqueryparam value="#imageIdList#" cfsqltype="integer" list="yes">)
</cfquery>
The logic at the end of this block takes the chosen radio box's value and sets the values before invoking the createCustomInterfaceWindow.
<!--- In this interface, the user chooses a radio button to create an image gallery or carousel. The galleryType uses the value of the chosen radio --->
if (galleryType == 'carousel'){
	var carouselId = json.carouselId;
	// optArgs passes either the carousel or galleryId. otherArgs is a string that indicates what the user has chosen to create
	var url = "/blog/includes/windows/customInterface.cfm?interfaceId=47&optArgs=" + carouselId + "&otherArgs=carousel";
} else {
	var galleryId = json.galleryId;
	var url = "/blog/includes/windows/customInterface.cfm?interfaceId=48&optArgs=" + galleryId + "&otherArgs=gallery";
}
The Carousel Window
The carousel window queries the database using the optArgs value and renders a carousel.
<!--- Get the carousel data from the db --->
<cfquery name="getCarousel" datasource="Demo">
	SELECT *
	FROM View_Carousel
	WHERE
		CarouselId = <cfqueryparam value="#URL.optArgs#" cfsqltype="integer">
</cfquery>
The Image Gallery Window
Like the carousel window, we query the database for information to render the image gallery.
<!--- Get the media gallery items --->
<cfquery name="getGallery" datasource="Demo">
	SELECT
		*
	FROM View_Gallery
	WHERE GalleryId = <cfqueryparam value="#URL.optArgs#" cfsqltype="integer">
</cfquery>
Simplified Code Example
The code below is vastly simplified and only shows the essential logic for working with multi-step Kendo Windows.
<!--- Put common stuff here, such as CSS stylesheets that are common for all windows. --->

<cfswitch expression="#URL.interfaceId#">

	<cfcase value="45">

		<!--- Uppy Uploader code...	--->
		<!--- XHR to post the images to the server and onSuccess callback method...	--->
		<!--- When Uppy is finished uploading, open the interface to choose whether to render an image carousel or gallery. If the user creates a carousel, the user needs to specify the font, effect, and shader. The image name, title, and font are entered if the user wants to create a gallery. --->
		createCustomInterfaceWindow( 46,<cfoutput>#URL.optArgs#</cfoutput>,$("#imageIdList").val() );

		<!--- More code --->

	</cfcase>

	<cfcase value="46">

		<!---  Replace the underscore with a comma so we can use it in the query below. --->
		<cfset imageIdList = replaceNoCase(URL.otherArgs, '_', ',', 'all')>

		<!--- Get the data from the db --->
		<cfquery name="getImageUrl" datasource="Demo">
			SELECT
				ImageId as ImageId,
				ImagePath as ImagePath,
				ThumbnailPath as ThumbnailPath
			FROM Image
			WHERE ImageId IN (<cfqueryparam value="#imageIdList#" cfsqltype="integer" list="yes">)
		</cfquery>

		<!--- AJAX to post the images to the server and callback function...	--->

		<!--- In this interface, the user chooses a radio button to create an image gallery or carousel. The galleryType uses the value of the chosen radio --->
		if (galleryType == 'carousel'){
			var carouselId = json.carouselId;
			// optArgs passes either the carousel or galleryId. otherArgs is a string that indicates what the user has chosen to create
			var url = "/blog/includes/windows/customInterface.cfm?interfaceId=47&optArgs=" + carouselId + "&otherArgs=carousel";
			var title = "Carousel Example";
		} else {
			var galleryId = json.galleryId;
			var url = "/blog/includes/windows/customInterface.cfm?interfaceId=48&optArgs=" + galleryId + "&otherArgs=gallery";
			var title = "Gallery Example";
		}

		<!--- More code --->
	</cfcase>

	<cfcase value="47">

		<!--- Get the carousel data from the db --->
		<cfquery name="getCarousel" datasource="Demo">
			SELECT *
			FROM View_Carousel
			WHERE
				CarouselId = <cfqueryparam value="#URL.optArgs#" cfsqltype="integer">
		</cfquery>
		<!--- More code to render a carousel. The user will close the window manually after they are done viewing the result --->

	</cfcase>

	<cfcase value="48">

		<!--- Get the media gallery items --->
		<cfquery name="getGallery" datasource="Demo">
			SELECT
				*
			FROM View_Gallery
			WHERE GalleryId = <cfqueryparam value="#URL.optArgs#" cfsqltype="integer">
		</cfquery>
		<!--- More code to render an image gallery. The user will close the window manually after they are done viewing the result --->

	</cfcase>

</cfswitch>
Related Blogs
Tags
Kendo Window


|
|
|
|
Hi, my name is Gregory! I have several degrees in computer graphics and multimedia authoring, and I have been developing enterprise web applications for the last 25 years. I love web technologies and the outdoors and am passionate about giving back to the community. |
|
This entry was posted on May 15, 2024 at 11:41 PM and has received 2526 views.
Comments
There are 0 comments.